Welcome to the Dyson DC39 user manual This guide introduces the vacuum’s design‚ key functions‚ and safety tips. It explains setup steps‚ controls‚ and how to maximize cleaning performance while ensuring safe operation Follow the sections for detailed instructions. Useit tokeep itrunningsoon!.

Safety and Warnings
Important safety information: keep the vacuum away from water‚ do not use in damp areas‚ avoid blocking air vents‚ keep cord clear‚ unplug before cleaning‚ do not expose to high temperatures‚ read all warnings store in a cool dry place. Follow manufacturer instructions to prevent injury.
Electrical Safety
Ensure the Dyson DC39 is connected to a properly grounded outlet with a grounded plug. Do not use cords or strips unless UL certified and rated for the vacuum’s power draw. Inspect the cord for fraying or exposed wires; replace if damaged. Keep the cord away from heat sources‚ sharp objects‚ and moving parts to prevent abrasion and keep it clean every day! Never touch the cord or plug with wet hands or while standing in water. Avoid operating the vacuum near flammable liquids or in damp environments. Ensure the outlet is free of dust and debris that could cause a short circuit. Do not overload the outlet by plugging other high‑power devices into the same circuit. Before plugging in‚ verify that the voltage matches the unit’s specifications. Keep the vacuum’s charging port and USB ports free of foreign objects. Do not force the plug into the outlet; insert it gently to avoid damaging the contacts. When unplugging‚ hold the plug‚ not the cord‚ to prevent strain on the wiring. Store the vacuum in a dry place‚ out of reach of children and pets. If the unit displays a fault indicator or the power light remains off‚ do not attempt to force power; consult the service center. Always follow the manufacturer’s recommendations for maintenance and cleaning of electrical components. Use only the supplied charger and accessories that meet the specified voltage and current ratings. Keep the vacuum’s power switch off when not in use. Follow local electrical codes and regulations when installing outlets
Power and Connectivity
The DC39 uses a 120V/60Hz mains supply. Connect the supplied power cord to a grounded outlet. The unit features a detachable USB port for firmware updates. Keep the cord free from damage and avoid overloading circuits. Use the supplied cable onlykep the plug dry.
Battery Charging
To charge the DC39’s lithium‑ion battery‚ first locate the charging dock that came with the unit. Place the vacuum on the dock so the charging contacts align with the battery terminals. Connect the supplied power cord to a grounded 120 V outlet. The charger’s LED will flash amber while charging and turn green once the battery is full. Do not use the vacuum while it is charging. Allow the battery to discharge to 20 % before re‑charging to extend its lifespan. Keep the dock and battery in a dry‚ well‑ventilated area away from direct sunlight or heat sources; If the charger fails to power the unit‚ check the outlet‚ replace the cord if frayed‚ and ensure the dock’s contacts are clean. The DC39’s battery can be fully charged in approximately 90 minutes. When the battery reaches 100 %‚ the charger will automatically disconnect‚ preventing over‑charging. Store the vacuum with the battery removed if you will not use it for an extended period; this helps maintain battery health. For any issues‚ consult the troubleshooting section or contact Dyson support.
Remember that the charger’s temperature should stay below 30 °C during use. Avoid placing the charger on soft surfaces that could block ventilation. If the charger shows a sudden drop in capacity‚ consider a battery replacement. Always unplug the charger before cleaning the dock. The DC39’s design includes a safety cut‑off that stops charging if the battery temperature rises above 45 °C. Following these guidelines will ensure safe and efficient battery maintenance. Use only the original charger. And keep it dry. Always.

Control Panel and Settings
The DC39’s control panel features a digital display and touch buttons for mode selection‚ suction power‚ and timer settings. Use the power button to turn on/off‚ swipe to adjust suction‚ and tap the timer icon to set cleaning duration. The panel also shows battery level and maintenance alerts.
Using the Remote Control
The Dyson DC39 remote offers convenient‚ hands‑free operation. It pairs via Bluetooth to the vacuum‚ allowing you to start‚ stop‚ and switch suction modes from a distance. To pair‚ press the power button on the remote until the LED flashes‚ then hold the pairing button on the vacuum until the indicator lights up. Once connected‚ the remote’s touch surface displays icons for high‚ medium‚ and low suction‚ a timer‚ and a turbo mode. Swipe up or down on the suction icons to adjust power; tap the timer icon to set a cleaning duration‚ and press the turbo button for a burst of extra suction on stubborn debris. The remote also includes a quick‑clean button that activates the self‑cleaning cycle‚ and a pause button to temporarily halt suction without turning the unit off. If the remote’s battery runs low‚ replace the CR2032 coin cell‚ which is easily accessible under the cover. For optimal performance‚ keep the remote within 30 cm of the vacuum and avoid obstructions that may interfere with the Bluetooth signal. The remote’s ergonomic design fits comfortably in the hand‚ and its responsive touch surface ensures precise control during cleaning sessions.
The remote’s intuitive interface lets users set timers‚ adjust suction levels‚ and choose modes for carpets or hard floors. Its lightweight design and ergonomic grip make maneuvering around furniture easy. The battery lasts for multiple sessions‚ and a low‑battery indicator keeps you ready!

Cleaning Modes and Features
Dyson DC39 offers multiple cleaning modes: Auto‚ Spot‚ and Edge. Auto mode adjusts suction for carpets or hard floors. Spot mode targets high‑traffic areas; Edge mode cleans along walls and furniture edges. Features include a brush bar and a HEPA filter for allergen capture for efficient cleaning O.
The Auto Mode on the Dyson DC39 automatically adjusts suction power based on floor type‚ ensuring optimal cleaning performance across carpets‚ rugs‚ and hard surfaces. When you start the vacuum‚ the sensor detects the floor texture and switches between high‑suction for deep‑cleaning carpets and lower‑suction for hardwood or tiles‚ preventing damage to delicate floors while still removing embedded dirt. The mode also monitors the brush bar’s activity; if the brush encounters a blockage or a sudden change in floor density‚ the system reduces suction to avoid overheating and then restores power once the obstacle clears. This adaptive feature extends battery life by using power only when necessary‚ allowing you to clean larger areas without frequent recharges. Auto Mode also integrates the HEPA filter automatically‚ ensuring that allergens and fine dust are captured and not released back into the air. The vacuum’s display will show a brief icon indicating that Auto Mode is active‚ and you can switch to Spot or Edge modes manually if you need more focused cleaning in a specific area. This intelligent‚ user‑friendly setting makes everyday cleaning effortless and efficient‚ maintaining both floor integrity and indoor air quality. The mode also reduces noise during light cleaning tasks‚ making it suitable for early morning or late night use. Additionally‚ the DC39’s sensor system can detect pet hair accumulation and automatically increase suction to maintain optimal performance.!

Attachments and Accessories
The Dyson DC39 comes with a range of attachments designed to tackle every cleaning challenge. The main wand features a flexible hose that allows you to reach high corners and under furniture with ease. Attached to the hose is the standard suction head‚ which is ideal for general floor cleaning on both carpets and hard surfaces. For deeper carpet cleaning‚ the motorized brush bar attachment delivers powerful‚ high‑frequency vibrations that dislodge embedded dirt and pet hair. The crevice tool‚ a narrow‚ tapered nozzle‚ is perfect for tight spaces such as baseboards‚ door frames‚ and between sofa cushions. The dusting brush‚ with its soft bristles‚ gently removes dust from delicate surfaces like lampshades‚ blinds‚ and electronics without scratching. The combination of these tools ensures that every surface in your home receives the appropriate cleaning action. All accessories are lightweight and easy to swap‚ allowing you to switch between tasks quickly. The attachments are also designed to fit securely onto the wand‚ preventing accidental detachment during use. For maintenance‚ simply detach the accessory‚ rinse it under running water‚ and allow it to dry before reattaching. Proper care extends the life of each component and maintains optimal suction performance. The DC39’s ergonomic design and versatile attachment set make it a powerful‚ all‑in‑one solution for everyday cleaning needs. Its robust build and user‑friendly interface make the DC39 reliable for busy households daily.
Maintenance and Cleaning
To keep the DC39 running smoothly‚ empty the bin after each use‚ rinse the filter weekly‚ and clean the brush bar with a damp cloth. Replace the filter every 6 months or when you notice reduced suction. Store the unit in a dry place‚ and avoid exposing it to extreme heat. Keep it dust‑free.!!!
Cleaning the Brush Bar
The brush bar is the heart of the DC39’s floor‑cleaning power. To keep it free of hair‚ lint‚ and debris‚ follow these steps: 1. Turn off and unplug the vacuum. 2. Remove the brush bar by sliding the release latch on the side of the unit. 3. Inspect the bar for tangled hair or foreign objects. 4. Use a pair of scissors or a brush bar cleaning tool to carefully cut away or pull out any obstructions. 5. Rinse the bar under running water‚ ensuring no water enters the motor housing. 6. Dry the bar completely with a clean towel before re‑installing. 7. Re‑attach the bar by aligning it with the slot and pushing until it clicks into place. 8. Test the brush bar by running the vacuum on a small area to confirm smooth operation. Regular cleaning of the brush bar extends the life of the motor and maintains suction performance. If you notice a drop in suction‚ inspect the brush bar first before checking the filter or bin. Performing this maintenance every 4–6 weeks will keep your DC39 in peak condition. For extra care‚ use a small brush or a dedicated brush‑bar cleaning kit to remove stubborn hair from the bar’s grooves. Store the brush bar in a dry place when not in use to prevent moisture buildup. If the bar becomes heavily clogged‚ replace it with a new one from the official Dyson accessories list. Follow these steps each time you notice a decrease in cleaning efficiency‚ and your vacuum will continue to deliver powerful‚ consistent performance. After each cleaning session‚ remove the brush bar and wipe it with a damp cloth to remove trapped particles. This simple step prevents hair from wrapping around the bar and ensures optimal suction. If you use the vacuum on carpeted surfaces‚ clean the bar twice a week to maintain performance. Remember that the brush bar is designed for single use; replace it promptly if it becomes excessively worn or damaged to avoid motor strain. Additionally‚ inspect the brush bar’s bearings for smooth rotation; if resistance is felt‚ clean or replace the bearings to maintain efficient cleaning. By following these guidelines‚ you’ll preserve the DC39’s suction power and extend the lifespan of its components.

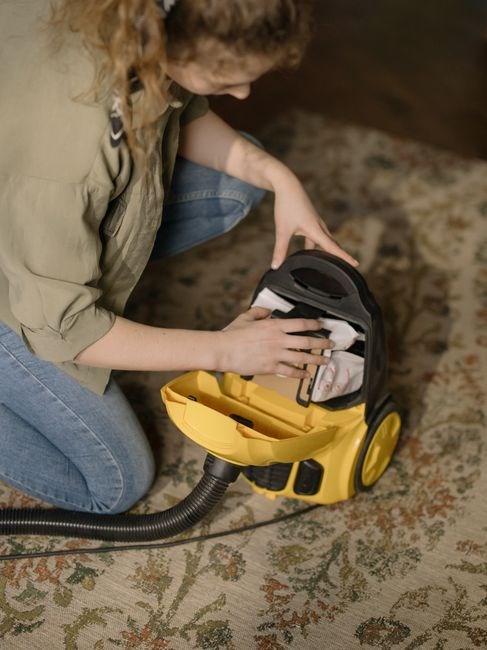
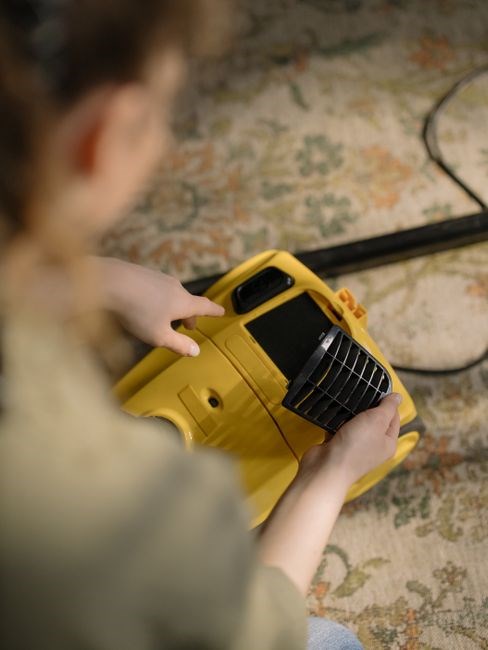
Filter Care
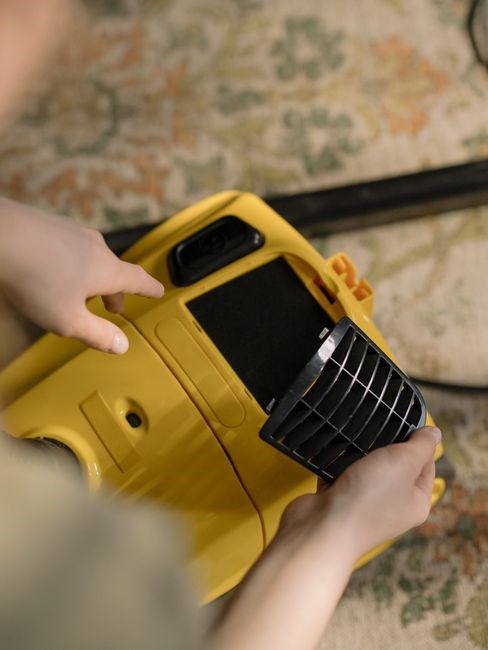
Dyson DC39 uses a two‑stage filtration system: a pre‑filter and a HEPA filter. The pre‑filter captures large particles and extends the life of the HEPA unit. To clean the pre‑filter‚ remove the filter housing by pulling the latch and lift the filter out. Gently tap the filter against a hard surface to dislodge dust‚ or rinse it under lukewarm water for up to 30 seconds. Allow it to air‑dry completely before reinserting. The HEPA filter should be replaced every 12 months or when a noticeable drop in suction occurs. Do not wash the HEPA filter; instead‚ discard it and install a new one from the official Dyson catalogue. After each cleaning cycle‚ inspect the filter housing for cracks or debris. If the housing is dirty‚ wipe it with a damp cloth and dry thoroughly. Keep the filters in a dry‚ cool place when not in use to prevent mold growth. Regular filter maintenance ensures optimal suction‚ protects the motor‚ and maintains indoor air quality. If you notice a strong odor or reduced airflow‚ check the filters first before troubleshooting other components. Follow the manufacturer’s recommended replacement schedule to keep your vacuum operating at peak efficiency. Proper filter care also extends the overall lifespan of the DC39‚ saving you money on repairs and replacements. For detailed replacement instructions‚ refer to the official Dyson support website or the included user manual. Thanks! By adhering to these filter care guidelines‚ you’ll enjoy cleaner floors and healthier indoor air.
Troubleshooting Common Issues
Check power‚ ensure outlet works‚ reset by unplugging 30s‚ inspect filter‚ clean brush‚ verify attachments‚ read error codes‚ consult support‚ replace worn parts‚ update firmware if applicable; Follow safety‚ contact service if unresolved. Check housing. Now!
No Power
When the Dyson DC39 fails to turn on‚ verify each potential cause. First‚ confirm the power cord is securely connected to both the unit and a functioning mains outlet. Test the outlet with another appliance or a voltage tester to ensure it supplies 120 V (or 240 V depending on region). If the outlet is fine‚ inspect the cord for visible damage‚ fraying‚ or kinks; replace it if any defects are found. Next‚ locate the safety switch on the handle; it should be in the “on” position. If the switch is stuck or damaged‚ gently reset it or replace the unit. The DC39 incorporates a thermal fuse that protects against overheating; a blown fuse will prevent power. To check‚ unplug the vacuum‚ remove the battery pack‚ and visually inspect the fuse for a broken filament. If the fuse appears blown‚ replace it with a compatible part. Battery packs also have a built‑in low‑voltage cutoff; if the battery is depleted or defective‚ the vacuum will not power on. Remove the battery‚ clean the contacts‚ and reinsert a charged pack. If the battery is still unresponsive‚ test it with a multimeter for 3.7 V output. A reading below 3.5 V indicates a need for replacement. Additionally‚ the DC39’s main control board may experience a short or a failed component. If all external checks pass‚ the issue likely resides on the board. In this case‚ contact Dyson support or an authorized service center for diagnostics and repair. Finally‚ always observe the safety instructions: keep the unit dry‚ avoid overloading the brush bar‚ and use only approved accessories. Following these steps will help isolate the power problem and restore functionality.Ensure unit on.!!
Warranty and Support
The Dyson DC39 is covered by a standard 2‑year limited warranty that protects against manufacturing defects in components and workmanship. The warranty period begins on the date of purchase and applies only to the original purchaser. It does not cover damage caused by misuse‚ accidental drops‚ exposure to liquids‚ or unauthorized repairs. To claim warranty service‚ contact Dyson customer support via the official website‚ phone‚ or authorized service centre. Provide proof of purchase‚ serial number‚ and a detailed description of the issue. Dyson will assess whether the problem falls within the warranty scope. If approved‚ the unit will be repaired or replaced at no charge. Parts and labor are covered‚ but shipping and handling fees may apply if the unit is shipped internationally. For repairs outside the warranty period‚ Dyson offers a paid service plan that extends coverage for an additional 12 months. The plan includes annual inspections‚ priority service‚ and discounted parts. Dyson also provides online resources such as troubleshooting guides‚ video tutorials‚ and a community forum where users can share tips and solutions. If you encounter a problem that cannot be resolved remotely‚ schedule a technician visit. Dyson technicians use genuine parts and follow strict quality standards. In rare cases where the unit is beyond repair‚ Dyson will offer a replacement or refund according to local consumer protection laws. For international customers‚ warranty terms may vary; consult the regional Dyson website for specific details. Always keep the original receipt and warranty card in a safe place‚ as they are required for any claim. By following these steps‚ you can ensure your DC39 remains in optimal condition and enjoy the full benefits of Dyson’s commitment to quality and customer satisfaction. Contact