seated leg exercises pdf

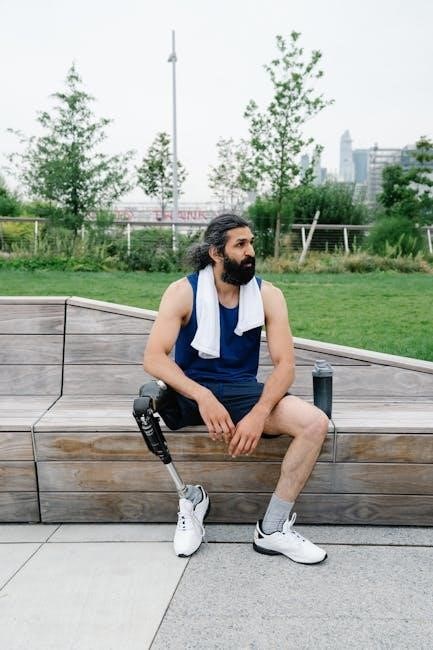
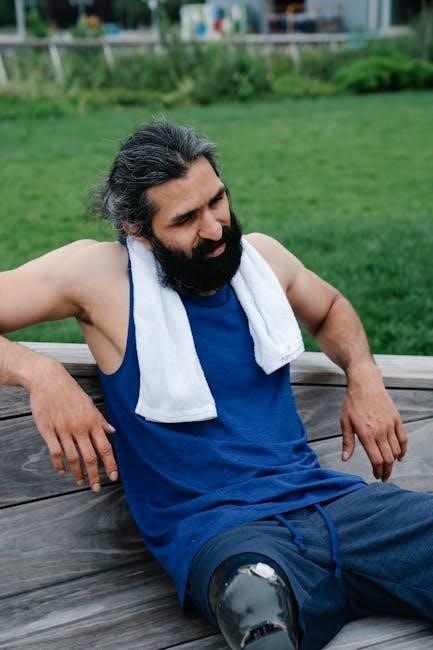
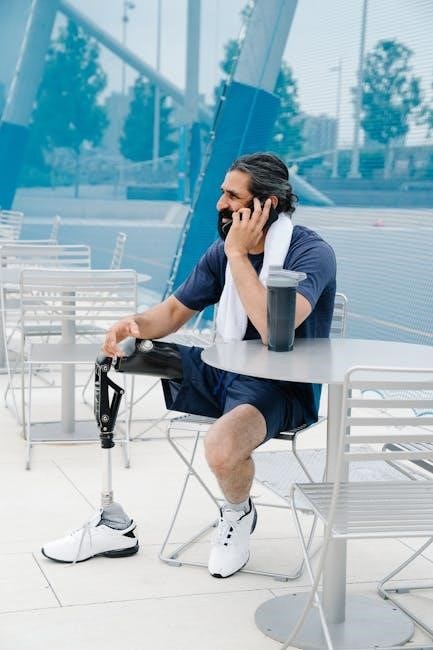
Seated leg exercises are an excellent way to strengthen lower body muscles, improve circulation, and enhance flexibility, especially for those with mobility challenges. They are low-impact, versatile, and can be done by anyone, making them ideal for various fitness levels. These exercises target key muscle groups, promoting overall leg strength and stability. Perfect for older adults, individuals recovering from injuries, or those seeking a convenient workout. Explore the benefits and techniques to incorporate these effective exercises into your routine for better health and mobility.
Continue reading to discover how seated leg exercises can transform your fitness journey.

Benefits of Seated Leg Exercises

Seated leg exercises offer numerous benefits, including strengthened lower body muscles, improved circulation, and enhanced flexibility. They are ideal for individuals with mobility challenges, as they can be performed comfortably while sitting. These exercises target key muscle groups like the quadriceps, hamstrings, and calves, promoting stability and balance. Regular practice can improve joint mobility, reduce stiffness, and support recovery from injuries or surgeries. Additionally, seated leg exercises are low-impact, making them suitable for older adults or those with physical limitations. They also contribute to better posture, prevent muscle atrophy, and can be modified to suit different fitness levels, ensuring a safe and effective workout experience for everyone.
Consistency yields noticeable improvements in overall leg strength and functional movement.

Effective Seated Leg Exercises

Seated marches, leg extensions, knee lifts, and lateral leg swings are highly effective for strengthening thighs, calves, and hips. These exercises improve mobility and muscle tone efficiently.
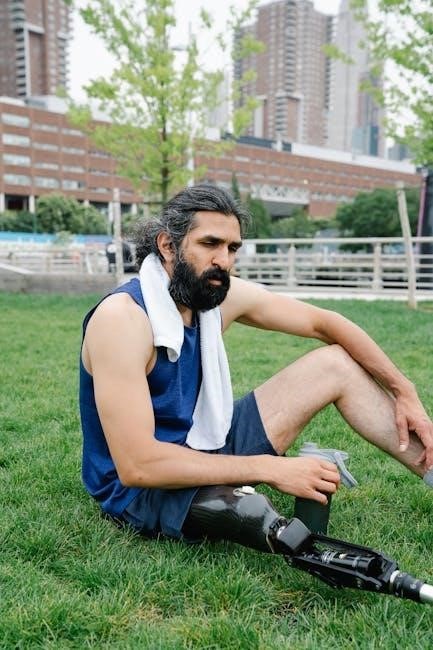
Seated Marches

Seated marches are a simple yet effective exercise for strengthening the legs. Sit with your back straight, feet hip-width apart, and firmly planted on the floor. Alternate lifting one leg at a time, keeping the knee bent at a 90-degree angle. Hold for a few seconds before lowering. Aim for 10-12 repetitions per leg. This exercise improves circulation, strengthens the thigh muscles, and enhances flexibility. For added challenge, increase the number of repetitions or incorporate resistance bands. Seated marches are ideal for those with mobility limitations, as they can be performed comfortably while seated, promoting muscle tone and overall lower body strength.

Leg Extensions

Leg extensions are a straightforward exercise targeting the quadriceps and thigh muscles. Sit comfortably with your back straight, feet flat on the floor, and knees bent at 90 degrees. Slowly lift one leg, straightening it as much as possible, then lower it back down. Perform 10-12 repetitions per leg. For added resistance, wear ankle weights or use resistance bands. This exercise strengthens the front of the thigh, improves knee mobility, and enhances overall leg strength. It’s ideal for improving circulation and maintaining muscle tone, especially for those with limited mobility. Repeat on the other leg and aim for 2-3 sets daily for optimal results.

Knee Lifts

Knee lifts are an effective seated exercise targeting the hip flexors and quadriceps. Sit straight with feet flat on the floor, knees bent at 90 degrees. Slowly lift one knee toward your chest, holding 2-3 seconds, then lower it back down. Perform 10-12 repetitions per leg. This exercise strengthens the front of the thigh, improves circulation, and enhances mobility. To add resistance, wear ankle weights or use resistance bands. Knee lifts are excellent for improving flexibility and maintaining muscle tone, especially for those with limited mobility. Repeat on the other leg and aim for 2-3 sets daily. Over time, increase repetitions as strength improves.

Lateral Leg Swings

Lateral leg swings are a dynamic seated exercise that targets the hip flexors, glutes, and calves. Sit straight with feet flat on the floor. Slowly swing one leg out to the side, keeping the knee straight, while maintaining a stable posture. Hold for a moment, then return to the starting position. Perform 10-12 repetitions on each leg. This exercise improves flexibility, strengthens the hip muscles, and enhances circulation. For added challenge, increase the swing height or add resistance with ankle weights. Lateral leg swings are ideal for improving range of motion and maintaining muscle tone, especially for those with mobility limitations. Aim for 2-3 sets daily and gradually increase repetitions as strength improves;

Seated Leg Press

The seated leg press is a powerful exercise for strengthening the quadriceps, hamstrings, glutes, and calves. Sit comfortably with your back against the chair and feet shoulder-width apart on the floor or a sturdy platform. Slowly push the platform away by extending your legs, then return to the starting position. This exercise improves leg strength, enhances muscle tone, and boosts circulation. For added resistance, wear ankle weights or increase the distance of the leg press. Perform 10-15 repetitions per set, aiming for 2-3 sets daily. Proper form is essential to avoid strain, so focus on smooth, controlled movements. This exercise is ideal for building lower body strength and maintaining mobility.

Ankle Pumps

Ankle pumps are a simple yet effective seated exercise that targets the muscles and improves circulation in the lower legs. Sit comfortably with your feet flat on the floor. Lift both heels off the ground, keeping your knees slightly bent, and hold for a few seconds. Slowly lower your heels back down without letting them touch the floor, then repeat. To enhance the workout, add resistance by wearing light ankle weights or increasing the number of repetitions. This exercise is particularly beneficial for individuals with limited mobility, as it helps prevent swelling and strengthens the calf muscles. Aim for 10-15 repetitions per set, performing 2-3 sets daily for optimal results. Ankle pumps are a versatile and convenient way to maintain leg health and improve overall circulation.

Heel Raises

Heel raises are a straightforward seated exercise that strengthens the calf muscles and improves circulation. Sit with your feet flat on the floor, knees slightly bent. Slowly lift both heels off the ground, keeping your knees steady, and hold for a few seconds. Lower your heels back down without letting them touch the floor, then repeat. To increase difficulty, add resistance with light ankle weights or perform the exercise on the edge of a chair. Heel raises are excellent for enhancing lower leg strength and flexibility. Aim for 10-15 repetitions per set, completing 2-3 sets daily. This exercise is ideal for improving mobility and preventing muscle atrophy in the legs.

Proper Form and Technique

Maintaining good posture is essential for seated leg exercises; Keep your back straight, core engaged, and feet flat on the floor. Use a sturdy chair for support and stability to ensure safe and effective movements. Proper form prevents injury and maximizes benefits. Always follow instructions carefully and adjust as needed for comfort and effectiveness.

Posture During Exercises

Maintaining proper posture during seated leg exercises is crucial for effectiveness and safety. Sit up straight with your back against the chair, feet flat on the floor, and knees at a 90-degree angle. Engage your core to support your spine and keep your shoulders relaxed; Ensure the chair is at a height where your hips are level with or slightly below your knees. Avoid slouching or leaning forward, as this can strain your lower back. Keep your head in a neutral position, with your ears aligned over your shoulders. Proper posture helps maximize the benefits of each exercise and minimizes the risk of injury. Consistency is key for optimal results.

Breathing Techniques

Proper breathing is essential during seated leg exercises to ensure comfort and effectiveness. Inhale deeply before starting each movement, filling your lungs fully. Exhale slowly as you perform the active part of the exercise, such as lifting or extending your legs. Avoid holding your breath, as this can cause unnecessary tension. Maintain a steady rhythm, exhaling on effort and inhaling during relaxation. For example, exhale while lifting your leg and inhale while lowering it. Consistent breathing helps maintain focus, prevents dizziness, and promotes muscle relaxation. Practice smooth, controlled breaths to enhance your workout experience and overall well-being during these exercises.

Tips for Progression

Gradually increase exercise intensity by adding repetitions, resistance, or time. Incorporate variations to challenge muscles differently. Focus on controlled movements and adjust as strength improves over time.

Increasing Repetitions

Start with 1 set of 10 repetitions per exercise, gradually increasing to 2 sets of 15 as strength improves. For seated marches, aim for 12 repetitions per leg. Leg extensions and knee lifts can begin with 10 reps, slowly raising the count. Lateral leg swings and heel raises should be done for 10-15 reps, adjusting as comfort allows; Ankle pumps can be repeated 10-20 times, focusing on smooth movements. Always consult a healthcare professional before starting, especially after surgery. Listen to your body; if pain occurs, reduce the number of reps or modify the exercise. Progress at your own pace for optimal results.

Adding Resistance

Adding resistance to seated leg exercises enhances muscle strength and endurance. Use ankle weights or resistance bands for leg extensions, marches, and lifts. For leg presses, increase the weight gradually. When performing knee lifts, add light dumbbells to the thighs. Heel raises can incorporate weights on the knees. Start with light resistance and progress slowly. Always consult a healthcare professional before adding weights, especially after surgery. Focus on controlled movements to avoid injury. Resistance bands are portable and versatile, making them ideal for home workouts. Incorporate these methods to intensify your routine and achieve stronger legs over time. Progress safely for optimal results.

Safety Precautions

Ensure proper posture and avoid overexertion during seated leg exercises. Stop if pain occurs. Consult healthcare professionals before starting, especially after surgery or injuries. Monitor discomfort closely.

Consulting Healthcare Professionals

Consulting healthcare professionals is essential before starting seated leg exercises, especially if you have medical conditions or recent surgeries. They can provide personalized advice to ensure safety and effectiveness.

Discuss your health history and goals with your doctor or physical therapist. They will help tailor exercises to your needs, preventing injuries and optimizing benefits. Always follow their guidance for a safe and successful routine.

Monitoring Discomfort or Pain

Monitor discomfort or pain during seated leg exercises to ensure safety. If pain occurs, stop the exercise immediately and rest.

If discomfort persists, modify the movement to a smaller range or avoid the exercise. Perform exercises slowly and smoothly, as jerky movements can exacerbate strain. Always prioritize comfort and adjust as needed to prevent injury; If pain continues, consult a healthcare professional for guidance. Listening to your body is crucial for a safe and effective workout experience.
Adjusting your approach ensures long-term benefits without risking harm.

Special Considerations

Seated leg exercises cater to diverse needs, including older adults and those with physical limitations. They promote independence and mobility without strain.
These exercises are adaptable, making them suitable for various fitness levels and abilities, ensuring safe and effective workouts for everyone.

Exercises for Older Adults

Seated leg exercises are particularly beneficial for older adults, helping maintain independence and mobility. They improve circulation, strengthen muscles, and enhance flexibility without strain.
Exercises like seated marches, leg extensions, and ankle pumps are ideal for older adults, as they can be done safely from a chair. These movements promote balance and reduce the risk of falls. They are low-impact, making them suitable for those with joint issues or mobility challenges. Regular practice can also boost cardiovascular health and overall well-being. Always consult a healthcare professional before starting, especially after surgery or for those with physical limitations. These exercises are a great way to stay active and healthy at any age.

Modifications for Physical Limitations

For individuals with physical limitations, seated leg exercises can be adapted to suit their needs. Reducing the range of motion or using supportive devices, like pillows or straps, can make exercises more accessible.
For example, those with limited mobility can perform smaller movements, such as partial leg lifts or gentle ankle pumps. Using assistive devices, like resistance bands or light weights, can also enhance the workout without strain. If standing is challenging, exercises like seated marches or leg extensions can be modified to maintain strength and flexibility. Always prioritize comfort and safety, adjusting exercises as needed to accommodate physical restrictions or discomfort.

Seated leg exercises offer a practical and effective way to enhance strength, flexibility, and mobility, especially for those with limited movement or recovering from injuries. By incorporating exercises like leg extensions, marches, and heel raises, individuals can improve circulation and maintain muscle tone. These exercises are adaptable to different fitness levels and can be modified to accommodate physical limitations. Consistency is key to seeing progress, so aim to perform these exercises regularly. Always prioritize proper form and consult a healthcare professional if needed. With dedication, seated leg exercises can be a valuable addition to your fitness routine, promoting overall well-being and independence.

beco gemini instructions

The Beco Gemini Baby Carrier is a popular, structured carrier offering front, back, and hip carry options. Its adjustable design supports babies from infancy to toddlerhood, providing comfort and versatility for parents. A top choice for its ergonomic features and ease of use, making it ideal for daily activities.

1.1 Overview of the Beco Gemini Baby Carrier

The Beco Gemini Baby Carrier is a structured, ergonomic babywearing solution designed for comfort and versatility. It offers four carrying positions: front inward, front outward, back, and hip carry. Suitable from infancy to toddlerhood, it features an adjustable seat and straps to accommodate growing babies and various parent preferences. Its durable design and easy-to-use buckles make it a popular choice for daily use.

1.2 Key Features and Benefits

The Beco Gemini Baby Carrier boasts an adjustable seat width, accommodating newborns to toddlers, with a weight capacity of 7–35 lbs. Its built-in infant support eliminates the need for an extra insert. The breathable, skin-friendly material ensures comfort for both baby and wearer. Multiple carrying positions—front inward, front outward, back, and hip—offer versatility. Ergonomic straps and a waist belt provide excellent support and distribute weight evenly, ensuring comfort during extended use.

Preparing for Use

Unpack and review all components. Read instructions carefully. Adjust seat width and strap lengths. Ensure all buckles and snaps are secure. Properly fit the carrier.

2.1 Unpacking and Initial Setup

Begin by carefully unpacking the Beco Gemini Baby Carrier. Inspect all components, including straps, buckles, and snaps. Adjust the seat width to the narrow setting for smaller babies or wider for older ones. Familiarize yourself with the waist belt and shoulder straps. Ensure all buckles and snaps are secure before first use. Refer to the manual for proper initial setup and adjustments.

2.2 Adjusting the Carrier for Proper Fit

Adjust the Beco Gemini Baby Carrier by first setting the seat width to match your baby’s size. For smaller babies, use the narrow setting, and for larger ones, widen it. Tighten the shoulder straps for a snug fit, ensuring the baby is high on your chest. Adjust the waist belt to fit your natural waistline, providing optimal support and comfort for both you and your baby.

Front Carry Instructions

The Beco Gemini allows for front carry facing in or out. Facing in is ideal for newborns and intimate bonding, while facing out suits curious older babies.

3.1 Front Carry Facing In

The front carry facing in position is perfect for newborns and younger babies who need close contact. Ensure the seat width is adjusted narrow for smaller infants. Place your baby on your chest, facing you, with their legs spread comfortably. Buckle the shoulder straps securely, tighten the chest clip, and adjust the waistband for a snug fit. This position promotes intimacy and is ideal for babies without full head control, offering support and comfort for both wearer and child.

3.2 Front Carry Facing Out

The front carry facing out position is suitable for babies with full head and neck control, typically from 4-6 months. Adjust the seat to its widest setting and ensure the baby’s legs are spread comfortably. Secure the shoulder straps snugly, position the chest clip at armpit level, and tighten all buckles. Ensure the baby is high on your chest for optimal support and visibility. This position offers a great view for curious babies while maintaining comfort and safety.

Back Carry Instructions

The back carry is ideal for older babies with strong neck control. Position the baby on your back, secure the waist belt, and tighten shoulder straps for comfort and support.

4.1 How to Transition to Back Carry

To transition to a back carry with the Beco Gemini, start by holding your baby securely on your front. Adjust the carrier’s waist belt to fit snugly around your natural waist. Gently lift the baby onto your back, ensuring their legs are in the “M” position. Bring the shoulder straps over your shoulders, secure the chest buckle, and tighten the straps for a comfortable, supportive fit. Always ensure all buckles and adjustments are secure before each use.

4.2 Securing the Baby in Back Carry

Once in the back carry position, ensure the baby’s legs are in the “M” position for optimal support. Adjust the seat width to fit their size and snap the headrest down for added stability. Tighten the shoulder straps evenly, ensuring the baby is high on your back with their face visible. Secure the chest buckle and check that all straps and buckles are snug and safe. Regularly verify the fit for comfort and safety.

Hip Carry Instructions

Position baby on your hip, ensuring proper support and comfort. Adjust straps for a secure fit, allowing easy access and visibility of your child.

5.1 Positioning the Baby for Hip Carry

For the hip carry, place your baby on one side, ensuring their legs are out and supported by the carrier. The baby should sit comfortably with their back straight and head resting near your chest. Adjust the base of the carrier to fit snugly around your waist, providing optimal support. This position is ideal for older babies with good head and neck control, offering easy access and visibility while keeping your hands free.

5.2 Adjusting Straps for Comfort and Support

Adjust the shoulder straps for a snug fit, ensuring the baby is held securely against you. Tighten or loosen the waist belt to distribute weight evenly across your hips. For the hip carry, ensure the leg openings are properly fitted around your baby’s thighs. Pull the straps gently from the back to achieve a comfortable and supportive position, keeping your baby high and close to your body for optimal comfort and safety.

Safety Precautions and Warnings

Always read instructions before use. Ensure all buckles and straps are secure. Keep baby carriers away from fire and avoid situations that could cause falls.

6.1 General Safety Guidelines

Always read the instructions carefully before using the Beco Gemini Baby Carrier. Ensure all buckles, straps, and adjustments are secure. Regularly check for wear and tear. Keep the carrier away from fire and avoid situations that could lead to falls. Be mindful of leg openings to prevent small babies from slipping through. Never use the carrier near open flames or during activities that could compromise safety. Ensure proper fit and positioning for your baby’s age and size to maintain stability and comfort.

6.2 Weight and Age Restrictions

The Beco Gemini Baby Carrier is designed for babies weighing 7 to 35 pounds (3.2 to 16 kg). It is suitable for infants as young as one month old, with proper adjustments, and can be used into toddlerhood. The carrier does not require an infant insert due to its adjustable seat, making it versatile for babies at various developmental stages. Always ensure the baby’s size and weight align with the carrier’s specifications for safe and comfortable use.

Troubleshooting Common Issues

Common issues include adjusting seat width for proper fit and resolving strap malfunctions. Ensure all buckles and snaps are secure before use for optimal safety and comfort.

7.1 Adjusting the Seat Width for Different Ages

Adjust the seat width by snapping the base to a narrow setting for younger babies and widening it as your child grows. For newborns, ensure the seat is snug to prevent leg openings from being too wide. As your baby matures, expand the seat for comfort and proper support. Always check the fit to ensure safety and optimal positioning.

7.2 Resolving Strap or Buckle Malfunctions

To address strap or buckle issues, first inspect for wear or damage. Ensure all buckles are securely fastened and straps are properly adjusted. If a strap is stiff, gently lubricate it with a soft cloth. For persistent malfunctions, consult the official Beco Gemini manual or contact customer support for assistance. Always prioritize your baby’s safety and the carrier’s proper function.

Additional Resources and Support

For further guidance, access instructional videos and the official Beco Gemini manual. Customer support is also available to assist with any questions or concerns about the carrier.

8.1 Accessing the Official Instruction Manual

The official Beco Gemini Baby Carrier manual is available for free download in PDF format. It provides detailed setup, safety guidelines, and usage instructions. The manual covers adjusting the seat width, securing straps, and understanding weight limits. Access it directly from the manufacturer’s website or through authorized retailers. This resource ensures proper use and safety for both parent and baby, making it essential for first-time users.

8.2 Helpful Videos and Tutorials

Video tutorials are available on platforms like YouTube and the official Beco website, demonstrating front, back, and hip carry techniques. These guides show how to adjust straps, secure your baby safely, and transition between positions. They also cover setting up the carrier for newborns and toddlers, ensuring proper fit and comfort. These resources help users master the Gemini’s features and use it confidently for everyday babywearing.

Frequently Asked Questions

Frequently asked questions about the Beco Gemini include whether it can be used for newborns and how to clean the carrier. These topics are addressed in detail.

9.1 Can the Beco Gemini Be Used for Newborns?

The Beco Gemini can be used for newborns starting from around 1 month of age. It features an adjustable seat that accommodates infants without requiring an additional insert. The carrier supports babies from 7 to 35 pounds, making it suitable for newborns through toddlers. Always ensure proper positioning and safety by following the manufacturer’s guidelines.

9.2 How to Clean and Maintain the Carrier

To clean the Beco Gemini, spot clean with mild detergent and water. Machine wash on a gentle cycle in a mesh laundry bag if needed. Avoid bleach or fabric softeners. Air dry thoroughly. Regularly inspect buckles, straps, and stitching for wear. Store in a cool, dry place. Proper maintenance ensures durability and safety for your baby.

Comparing the Beco Gemini to Other Models

The Beco Gemini is often compared to the Beco Gemini Cool and Beco Toddler Carrier, standing out for its versatility and comfort, making it a top choice for many parents.

10.1 Beco Gemini vs. Beco Gemini Cool

The Beco Gemini and Gemini Cool share similar features but differ in material. The Gemini Cool uses breathable mesh, ideal for warm weather, while the standard Gemini offers soft, durable fabric. Both models support the same weight range (7-35 lbs) and provide adjustable settings for comfort. The main choice lies in preference for breathability versus traditional fabric comfort.

10.2 Beco Gemini vs. Beco Toddler Carrier

The Beco Gemini is designed for babies from 7 to 35 lbs, offering front, back, and hip carry options. In contrast, the Beco Toddler Carrier accommodates older children up to 45 lbs, providing extended support for larger toddlers. While both share similar structural elements, the Toddler Carrier is specifically tailored for older, heavier children, making it a better option for families with growing kids.

User Reviews and Ratings

The Beco Gemini has an average rating of 100/100, praised for its adjustability, comfort, and versatility. Parents love its ergonomic design and ease of use, making it a top choice for babywearing.

11.1 Average Product Rating and Feedback

The Beco Gemini Baby Carrier boasts an impressive average rating of 100/100, with parents praising its adjustability, comfort, and versatility. Many highlight its ergonomic design and ease of use, making it ideal for both front and back carrying positions. The carrier’s ability to accommodate babies from 7 to 35 pounds ensures long-term usability, with feedback consistently emphasizing its value and durability for growing families.

11.2 Common Praise and Criticisms

Parents often praise the Beco Gemini for its adjustability, comfort, and versatility in accommodating different carrying positions. The lack of an infant insert and easy transition between settings are highlighted as major advantages. However, some users find it less ideal for newborns and note that forward-facing positions may lack sufficient head support, requiring careful adjustment for younger babies to ensure safety and comfort.

The Beco Gemini offers versatile, comfortable babywearing solutions with multiple positions and adjustable features, supported by a detailed manual and instructional videos for ease of use.

12.1 Final Tips for Getting the Most Out of Your Beco Gemini

Always ensure a snug fit by adjusting straps and seat width according to your baby’s age and size. Explore all carrying positions to find what works best for you and your baby. Regularly check and maintain buckles and straps for safety. Refer to the manual or instructional videos for guidance. Clean and store the carrier properly to extend its lifespan. Enjoy the versatility and comfort it offers for both you and your child!

12.2 Encouragement to Explore Additional Babywearing Resources

Explore beyond the Beco Gemini by discovering other babywearing resources, such as instructional videos, community forums, and reviews of carriers like Tula and Ergobaby. Learning about different styles and techniques can enhance your babywearing experience. Engage with online communities and experts to gain insights and tips for using your carrier effectively. Continuous learning will help you maximize comfort and safety for both you and your baby.

archaeology guide cata classic

Archaeology is a new secondary profession in WoW Cataclysm Classic, allowing players to uncover ancient relics and treasures. It offers unique rewards and insights into the game’s lore.

1.1 What is Archaeology?

Archaeology is a secondary profession introduced in WoW Cataclysm Classic, enabling players to uncover ancient artifacts by surveying and excavating dig sites. It involves analyzing relics to gain skill points and rewards. This profession allows players to explore the game’s lore and history while discovering unique items. Archaeology is accessible to all characters, offering a fresh way to engage with the game world beyond traditional professions. It combines exploration, puzzle-solving, and progression, making it a rewarding activity for adventurers seeking both knowledge and treasure.

1.2 Importance of Archaeology in Cataclysm Classic

Archaeology in Cataclysm Classic is a vital profession that offers unique rewards and enhances gameplay. It provides players with combat and non-combat items, including powerful gear like item level 359 equipment. This profession also contributes to the game’s economy by allowing players to farm gold and rare artifacts. Additionally, Archaeology adds depth to the game’s lore, enabling players to uncover Azeroth’s history. Its versatility makes it a valuable activity for both progression and enrichment, appealing to adventurers and collectors alike.

Learning Archaeology

Archaeology is a secondary profession in Cataclysm Classic, easily learned from trainers in major cities. It’s accessible to all characters, offering a unique way to explore Azeroth.

2.1 Finding an Archaeology Trainer

To begin with Archaeology, locate a trainer in major cities like Stormwind, Orgrimmar, or Shattrath. These trainers will teach you the basics of this profession, enabling you to start your archaeological journey and uncover hidden treasures across Azeroth.

2.2 How to Get Started with Archaeology

Once you’ve found a trainer, they’ll teach you the basics of Archaeology. You’ll gain the Survey ability, which helps locate dig sites. Use it to pinpoint artifact locations, then excavate them. As you progress, you’ll unlock higher-tier surveys and rewards. Keep practicing to level up your skills and uncover rare items. Remember to equip your Surveying Tool from your inventory to begin your archaeological adventures in Azeroth.

The Archaeology Process

The Archaeology process involves surveying and excavating to uncover ancient artifacts. Each successful excavation provides fragments used to solve artifacts, granting skill points and progressing your rank.

3.1 Surveying and Excavating

Surveying and excavating are core activities in Archaeology. Use the survey tool to locate dig sites, marked by yellow dots on your mini-map. Excavate these sites to collect fragments of ancient artifacts. Each excavation consumes a survey charge, and multiple fragments are needed to complete an artifact. As you progress, the process becomes more efficient, allowing you to uncover rare items and gain skill points. This hands-on approach is essential for mastering the profession and progressing through its ranks.

3.2 Solving Artifacts for Skill Points

Solving artifacts is a crucial part of Archaeology, rewarding you with skill points. Once you gather enough fragments from surveying, you can solve artifacts to earn 15 skill points per completion. This process is essential for leveling up your Archaeology skill. Each solved artifact brings you closer to unlocking higher tiers of rewards and improving your proficiency in the profession. Solving artifacts also provides valuable insights into the game’s lore and history, making it a rewarding experience for players.

Rewards from Archaeology

Archaeology offers diverse rewards, including powerful items and rare equipment. These rewards enhance your character’s abilities and progression in the game.

4.1 Combat and Non-Combat Rewards

Archaeology in WoW Cataclysm Classic offers a variety of rewards, including powerful combat gear and non-combat items. Players can unlock rare relics, such as item level 359 equipment, which significantly enhance character performance in battles. Non-combat rewards include unique vanity items and materials that aid in other professions. These rewards not only improve gameplay but also provide a deeper connection to the game’s lore and history.

4.2 Item Level 359 Rewards

Archaeology in WoW Cataclysm Classic rewards players with item level 359 gear, some of the strongest available at the time. These high-quality items include weapons, armor, and accessories, offering significant stat boosts. They are highly sought after for both PvE and PvP, making them valuable for progression. These rewards are rare and require advanced Archaeology skills, adding to their prestige and desirability among players. Unlocking such items is a key incentive for mastering the profession.

Leveling Up Archaeology

Leveling Archaeology involves surveying dig sites, uncovering fragments, and solving artifacts. Early levels focus on surveying, while higher levels allow solving artifacts for skill points efficiently.

5.1 Tips for Efficient Leveling

To level Archaeology efficiently, focus on surveying dig sites thoroughly and solving artifacts once surveying stops at level 50. Prioritize high-level dig sites for better fragments. Use your hearthstone to quickly travel between zones, minimizing downtime. Solve artifacts as soon as possible to gain skill points consistently. Specialize in specific types of artifacts to maximize efficiency and rewards. Consider farming in less populated areas to avoid competition for dig sites.

5.2 Gaining Skill Points Through Artifacts

Gaining skill points in Archaeology is achieved by solving artifacts. Each artifact solved awards 5 skill points, with 15 points required to gain a new level. This system encourages players to actively engage in excavating and solving artifacts to progress. Focus on solving high-quality artifacts to maximize skill point gains efficiently. Regularly solving artifacts ensures steady progression, making it a cornerstone of leveling up your Archaeology skill.

Archaeology Trainers and Locations

Archaeology trainers are found in major cities like Stormwind and Orgrimmar, as well as key locations such as Shattrath, making it easy for players to access training.

6.1 Major Cities with Archaeology Trainers

Major cities like Stormwind, Orgrimmar, and Shattrath have dedicated Archaeology trainers. These trainers teach the profession and help players unlock its potential, making them essential stops for any aspiring archaeologist.

6.2 Shattrath and Other Key Locations

Shattrath, a major hub in Outland, is home to an Archaeology trainer and serves as a central location for players. Other key areas include cities like Dalaran and Exodar, which also provide access to trainers. These locations are crucial for learning and advancing in Archaeology, offering convenient starting points for your relic-hunting journey across Azeroth and beyond.

Artifacts and Their Significance

Artifacts are ancient relics uncovered through Archaeology, offering insights into Azeroth’s history. They vary in type and rarity, holding great value for players seeking rewards and lore.

7.1 Types of Artifacts You Can Discover

In WoW Cataclysm Classic, Archaeology allows players to uncover various artifact types, including ancient weapons, scrolls, and mysterious devices. These relics often hold significant lore and historical value, providing glimpses into Azeroth’s past. Each artifact type offers unique rewards and can be used to progress through the profession or sold for gold. Rare and epic artifacts are highly sought after for their powerful bonuses and aesthetic appeal, making them a key focus for dedicated archaeologists.

7.2 Using Artifacts for Game Progression

Artifacts in WoW Cataclysm Classic are invaluable for game progression. They can be equipped to enhance abilities, sold for gold, or used to craft powerful items. Rare artifacts often provide unique bonuses, boosting combat effectiveness or non-combat skills. High-item-level rewards, such as epic gear, are particularly sought after for raiding and PvP. Additionally, artifacts can be sold on the in-game market, making Archaeology a lucrative profession for gold farming and supporting other aspects of your character’s development.

Archaeology and the Game Economy

Archaeology significantly influences the game economy, offering rare items and materials. It plays a key role in gold farming and impacts the demand for artifacts in the market.

8.1 Role of Archaeology in Gold Farming

Archaeology plays a pivotal role in gold farming by providing rare artifacts and items. These can be sold for substantial profits on the in-game market. High-demand items, such as those with high item levels or unique stats, attract top gold. Additionally, the profession’s ability to craft items that are not readily available through other means makes it a lucrative venture for players looking to amass wealth. This makes Archaeology a key component of any gold farming strategy in Cataclysm Classic.

8.2 Impact on the In-Game Market

Archaeology significantly influences the in-game market by introducing unique items and artifacts. These items, often exclusive to the profession, create high demand among players seeking powerful gear. The availability of rare artifacts can shift market dynamics, driving up prices for certain goods. This exclusivity allows players to corner specific markets, creating opportunities for profit. Additionally, the introduction of new items can disrupt traditional market trends, making Archaeology a key factor in shaping the economy of Cataclysm Classic.

Archaeology in WoW Cataclysm Classic is a rewarding profession, offering unique rewards and high-level items. Its significance in the game’s economy and lore makes it a valuable pursuit.

9.1 Final Tips for Mastering Archaeology

To master Archaeology in WoW Cataclysm Classic, focus on consistent practice and efficient surveying techniques. Prioritize leveling your skill early to unlock higher-tier rewards. Explore various zones thoroughly to maximize artifact discoveries. Stay updated on in-game market trends to optimize gold farming opportunities. Lastly, complement Archaeology with other professions to enhance your character’s overall progression and profitability in the game.

9.2 The Future of Archaeology in WoW Classic

Archaeology in WoW Classic continues to evolve, with potential updates and expansions introducing new artifacts and zones. As Blizzard refines the profession, players can expect more balanced rewards and engaging content. The community’s interest in lore and profit-driven activities ensures Archaeology’s relevance; Future patches may expand its role in the game economy, offering fresh challenges and opportunities for adventurers. Stay tuned for updates that could redefine this unique profession’s impact on Azeroth’s world.

2018 chevrolet equinox owners manual

The 2018 Chevrolet Equinox is a compact SUV blending practicality and style‚ offering a reliable and versatile driving experience․ This guide provides essential information for owners to understand and maintain their vehicle effectively․

1․1 Importance of the Owner’s Manual

The owner’s manual is a crucial resource for understanding the 2018 Chevrolet Equinox․ It provides detailed information about safety features‚ maintenance schedules‚ and troubleshooting tips․ By reading the manual‚ owners can maximize their vehicle’s performance‚ ensure proper care‚ and avoid potential issues․ It also offers guidance on advanced technologies and custom settings‚ helping drivers personalize their experience․ Keeping the manual in the vehicle ensures quick access to essential information‚ making it an indispensable tool for responsible ownership․ Regularly reviewing the manual helps owners stay informed and confident behind the wheel․

1․2 How to Use the Manual Effectively

To use the 2018 Chevrolet Equinox manual effectively‚ start by reviewing the table of contents to locate specific topics quickly․ Use the search function in digital versions to find keywords or sections․ Pay attention to warning symbols and notes‚ as they highlight critical information․ For complex features‚ refer to step-by-step guides and diagrams․ Organize the manual with bookmarks or tabs for easy navigation․ Regular updates and additional resources‚ like online guides‚ ensure you stay informed about your vehicle’s maintenance and operation․

Safety Features

The 2018 Chevrolet Equinox includes a comprehensive suite of safety features‚ such as airbags‚ electronic stability control‚ and advanced driver-assistance technologies‚ ensuring optimal protection and confidence on the road․

2․1 Standard Safety Features

The 2018 Chevrolet Equinox comes equipped with a range of standard safety features designed to protect occupants and prevent accidents․ These include multiple airbags‚ electronic stability control‚ and an anti-lock braking system (ABS)․ Additionally‚ a rear vision camera is standard‚ providing enhanced visibility when reversing․ The vehicle also features a tire pressure monitoring system‚ ensuring optimal tire performance and safety on the road․ These features work together to create a secure driving environment‚ giving owners peace of mind behind the wheel․

  • MultIPLE AIRBAGS FOR OCCUPANT PROTECTION
  • ELECTRONIC STABILITY CONTROL FOR IMPROVED TRACTION
  • ANTI-LOCK BRAKING SYSTEM (ABS)
  • REAR VISION CAMERA
  • TIRE PRESSURE MONITORING SYSTEM

2․2 Advanced Safety Technologies

The 2018 Chevrolet Equinox offers advanced safety technologies to enhance driver confidence․ Features like Forward Collision Alert and Lane Departure Warning use sensors and cameras to monitor the road․ Adaptive Cruise Control adjusts speed to maintain a safe distance‚ while Rear Cross Traffic Alert improves safety during reversing․ These technologies‚ combined with automatic emergency braking‚ provide comprehensive protection and assist drivers in avoiding potential hazards․ They exemplify Chevrolet’s commitment to innovation and safety‚ ensuring a secure and modern driving experience for all occupants․

  • FORWARD COLLISION ALERT
  • LANE DEPARTURE WARNING
  • ADAPTIVE CRUISE CONTROL
  • REAR CROSS TRAFFIC ALERT
  • AUTOMATIC EMERGENCY BRAKING
  • Vehicle Overview

    The 2018 Chevrolet Equinox is a compact SUV offering a blend of practicality and style․ It features a spacious interior‚ versatile cargo options‚ and modern design elements․

    3․1 Exterior Features

    The 2018 Chevrolet Equinox boasts a sleek and aerodynamic exterior design with a bold front grille‚ LED headlights‚ and alloy wheels․ It also features a hands-free power liftgate for convenience‚ providing easy access to the cargo area․ The compact SUV offers a range of vibrant color options‚ enhancing its modern appeal․ Additionally‚ optional roof rails and crossbars are available for added versatility‚ catering to diverse lifestyles and needs․

    3․2 Interior Features and Comfort

    The 2018 Chevrolet Equinox offers a spacious and upscale interior designed for comfort and convenience․ Premium materials and ergonomic seating provide a refined driving experience․ The cabin features a dual-zone automatic climate control system‚ heated front seats‚ and a heated steering wheel for added comfort․ The infotainment system includes an 8-inch touchscreen with Apple CarPlay and Android Auto compatibility․ Ample cargo space‚ with 29․9 cubic feet behind the rear seats and up to 63․5 cubic feet with seats folded‚ makes it ideal for both daily commutes and adventures․ A cargo management system adds versatility for organizing belongings․

    Instruments and Controls

    The dashboard features a clear instrument cluster‚ intuitive controls‚ and a central touchscreen for infotainment․ Buttons for climate‚ audio‚ and driver assists are logically arranged for easy access․

    4․1 Dashboard Overview

    The 2018 Chevrolet Equinox dashboard is designed for driver convenience and clarity․ It features a central infotainment touchscreen‚ climate control buttons‚ and an instrument cluster displaying speed‚ fuel level‚ and warnings․ The steering wheel houses audio and cruise controls‚ while the gearshift is centrally located for easy access․ The dashboard also includes USB ports and a 12V power outlet for charging devices․ This layout ensures all essential functions are within the driver’s reach‚ promoting a safe and enjoyable driving experience․

    4․2 Infotainment System

    The 2018 Chevrolet Equinox features an intuitive infotainment system with an 8-inch touchscreen display․ It supports Apple CarPlay and Android Auto for seamless smartphone integration․ The system includes Bluetooth connectivity‚ voice command functionality‚ and USB ports for media playback․ Drivers can access navigation‚ climate controls‚ and vehicle settings through the interface․ The infotainment system also offers customizable profiles and SiriusXM radio compatibility‚ enhancing the overall driving experience with convenience and entertainment options․

    Driving Information

    The 2018 Chevrolet Equinox offers a smooth driving experience with responsive steering and efficient transmission‚ ensuring comfort and control․ Advanced technology features enhance the drive․

    5․1 Starting and Operating the Vehicle

    To start the 2018 Chevrolet Equinox‚ insert the key fob into the vehicle‚ press the brake pedal‚ and press the push-button start․ Ensure all lights on the dashboard dim or turn off after starting․ Adjust settings like temperature‚ seating‚ and mirrors for comfort․ Always perform a quick check of mirrors‚ seatbelts‚ and surroundings before driving․ The vehicle features a smooth ignition system and responsive controls․ For added convenience‚ remote start is available on select models․ Refer to the manual for detailed steps on operating adaptive features and advanced driving modes․

    5․2 Transmission and Driving Modes

    The 2018 Chevrolet Equinox features a smooth 6-speed automatic transmission‚ ensuring seamless gear shifts and responsive acceleration․ It also offers selectable drive modes‚ including Normal‚ Sport‚ and Snow‚ to adapt to various driving conditions․ The Sport mode enhances throttle response for a more dynamic feel‚ while Snow mode optimizes traction for slippery surfaces․ For added control‚ the available all-wheel-drive system distributes power between front and rear wheels‚ improving stability and grip․ These features collectively enhance the driving experience‚ providing both comfort and confidence behind the wheel․

    Maintenance and Care

    Regular maintenance is crucial for the longevity and performance of your 2018 Chevrolet Equinox․ Follow the owner’s manual for scheduled services‚ fluid checks‚ and inspections to ensure optimal functionality and safety․

    6․1 Scheduled Maintenance

    Scheduled maintenance is essential to ensure the longevity and performance of your 2018 Chevrolet Equinox․ Follow the recommended service intervals outlined in the owner’s manual․ Regular oil changes‚ tire rotations‚ and inspections are critical․ The manual specifies intervals for services such as spark plug replacement and fluid checks․ Adhering to these schedules helps prevent wear and tear‚ maintains fuel efficiency‚ and ensures safety․ Neglecting scheduled maintenance can lead to premature component failure and increased repair costs․ Always refer to the manual for detailed guidelines and recommendations tailored to your vehicle’s needs․

    Troubleshooting and Repairs

    This section provides guidance for identifying and addressing common issues in your 2018 Chevrolet Equinox․ Refer to diagnostic alerts and warning lights for timely repairs and maintenance․

    7․1 Diagnostic Alerts and Warning Lights

    The 2018 Chevrolet Equinox features a range of diagnostic alerts and warning lights to monitor vehicle systems․ These indicators‚ displayed on the dashboard‚ signal maintenance needs‚ system malfunctions‚ or safety concerns․ Familiarize yourself with symbols like the check engine light‚ tire pressure monitor‚ or battery alert․ Each light corresponds to specific issues‚ ensuring timely attention․ Refer to the owner’s manual for detailed explanations and guidance on addressing these alerts․ If a light illuminates‚ consult the manual or contact a certified technician for assistance to maintain your vehicle’s optimal performance and safety․

    Warranty and Support

    The 2018 Chevrolet Equinox comes with a comprehensive warranty program designed to protect your investment․ It includes a 3-year/36‚000-mile bumper-to-bumper warranty and a 5-year/60‚000-mile powertrain warranty․ Additional support includes 5 years or 60‚000 miles of roadside assistance and courtesy transportation․ For detailed coverage and terms‚ refer to the owner’s manual or visit Chevrolet’s official website․ These programs ensure peace of mind and reliable service for your vehicle‚ providing coverage for parts‚ labor‚ and unexpected repairs during the warranty period․

    Accessories and Customization

    The 2018 Chevrolet Equinox offers a variety of accessories to enhance functionality and personalization․ From roof racks and cargo management systems to exterior styling elements‚ these additions allow owners to tailor their vehicle to their lifestyle․ Interior accessories like premium floor mats and cargo trays provide added convenience․ Additionally‚ Chevrolet provides customization options for exterior trim‚ wheels‚ and decals to give your Equinox a unique look․ These accessories are designed to complement the vehicle’s design while maintaining its performance and durability‚ ensuring a seamless integration with your driving experience․

    Technical Specifications

    The 2018 Chevrolet Equinox features a range of technical specifications that define its performance and capabilities․ With a choice of engines‚ including a 1․5L turbocharged option‚ the Equinox delivers efficient power․ Its compact design allows for agile handling‚ while the available all-wheel-drive system enhances traction․ The vehicle offers a maximum cargo capacity of up to 63․5 cubic feet‚ making it versatile for various needs․ The Equinox also comes with a 6-speed automatic transmission‚ ensuring smooth acceleration․ These specifications highlight the model’s balance of functionality‚ efficiency‚ and reliability‚ catering to diverse driving preferences and requirements‚ ensuring a robust and adaptable vehicle for everyday use․

antelope canyon self guided tour

Overview of Antelope Canyon and Self-Guided Tours

Antelope Canyon is a stunning natural wonder in Arizona, known for its breathtaking sandstone formations and unique light beams. Self-guided tours offer an adventurous way to explore its beauty.

While self-guided exploration is possible, it comes with specific restrictions. Lower Antelope Canyon allows independent visits, while Upper Antelope Canyon requires a guided tour for safety and preservation reasons.

Antelope Canyon is a breathtaking natural wonder in Arizona, famous for its stunning sandstone formations and vibrant color displays. Located near Page, it’s a must-visit for photographers and hikers. The canyon is divided into sections, each offering unique experiences. As part of the Navajo Nation, it’s protected, with guided tours often necessary to preserve its beauty and ensure visitor safety, especially due to flash flood risks; This ensures an unforgettable adventure while maintaining environmental integrity.

1.2 Understanding Self-Guided Tours in Antelope Canyon

Self-guided tours in Antelope Canyon offer an adventurous way to explore its natural beauty independently. While most sections require guided tours, Lower Antelope Canyon allows visitors to navigate on their own. This option is ideal for those seeking flexibility and solitude; However, it’s important to note that self-guided exploration still requires adherence to safety guidelines and environmental regulations to preserve the canyon’s fragile ecosystem and ensure a safe experience for all visitors.

Are Self-Guided Tours Allowed in Antelope Canyon?

Self-guided tours are generally not permitted in Antelope Canyon, except for Lower Antelope Canyon, which allows independent exploration under specific conditions and safety precautions.

2.1 Restrictions on Self-Guided Exploration

Self-guided exploration in Antelope Canyon is heavily restricted, with Upper Antelope Canyon requiring mandatory guided tours. Lower Antelope Canyon allows independent visits but demands strict adherence to safety guidelines and permits. Flash flood risks and narrow passageways necessitate caution, and visitors must stay alert to navigate safely without professional guidance. The Navajo Nation enforces these rules to protect both visitors and the fragile environment of the canyon.

2.2 Reasons for Guided Tour Requirements

Guided tours are mandatory due to safety concerns, such as flash floods and narrow passageways. Expert guides ensure visitors navigate safely and responsibly. Additionally, guided tours protect the canyon’s fragile environment and cultural heritage, preserving its natural beauty for future generations. The Navajo Nation enforces these requirements to maintain control over access and ensure a safe, educational, and respectful experience for all visitors while safeguarding the canyon’s sensitive ecosystem.

Exploring Lower Antelope Canyon Without a Guide

Lower Antelope Canyon is the only section allowing self-guided exploration, offering an adventurous experience. A permit is required, enabling visitors to navigate its stunning formations independently.

3.1 Differences Between Upper, Lower, and Canyon X

Upper Antelope Canyon is famous for its dramatic light beams, while Lower Antelope Canyon offers a more adventurous, narrower experience. Canyon X combines both, with lesser crowds and unique formations. Unlike Upper, Lower Antelope Canyon allows self-guided exploration with a permit, making it a popular choice for independent visitors. Canyon X provides a quieter alternative, ideal for those seeking solitude and unspoiled natural beauty, though guided tours are still recommended for safety and navigation.

3.2 Navigating Lower Antelope Canyon Independently

Lower Antelope Canyon is the only section where self-guided exploration is permitted, offering a unique adventure. The canyon is approximately 0.5 miles round trip, taking about an hour to navigate. Visitors must obtain a permit and stay on designated paths. While no guide is required, it’s essential to be aware of potential flash floods and narrow passages. The stunning formations and tranquil atmosphere make it a rewarding experience for those who prefer independent exploration.

Planning Your Visit to Antelope Canyon

Plan your visit by securing permits and entry fees. Check tour operator details for pricing and availability, ensuring a smooth and enjoyable experience.

4.1 Best Times to Visit for Optimal Lighting

For optimal lighting, visit Antelope Canyon during midday when sunlight filters through the canyon’s cracks, creating stunning light beams. Upper Antelope Canyon is famous for this phenomenon, best seen between 11 AM and 1 PM. Lower Antelope Canyon offers softer, diffused light, ideal for photography without harsh beams. Plan your visit during clear, sunny days for the most dramatic effects. Early morning or late afternoon visits can also capture beautiful golden hour tones, enhancing your photographic experience.

4.2 Necessary Permits and Entry Fees

Visiting Antelope Canyon requires an $8 per person entry fee, valid for one day and location. Additional guided tour costs vary, starting at $40 for Lower Canyon tours and $50 for Upper Canyon tours. Permits can be purchased on-site or through authorized tour operators. These fees support canyon preservation and Navajo Nation initiatives. Ensure you secure permits in advance, especially during peak seasons, to avoid delays and guarantee access to this breathtaking natural wonder.

Safety Considerations for Self-Guided Tours

Flash floods pose a significant risk in Antelope Canyon, requiring constant vigilance. Essential gear includes water, a map, and a first aid kit for safe exploration.

5.1 Flash Flood Risks and Precautions

Antelope Canyon is highly susceptible to flash floods, which can occur suddenly and without warning. These natural disasters pose significant risks, especially in narrow passages. Visitors must monitor weather conditions closely, as heavy rain in distant areas can trigger flooding. Stay informed about local weather forecasts and avoid exploring during rainy seasons. Always carry a reliable communication device and know evacuation routes. Heed warnings from local authorities, as flash floods can be deadly. Stay vigilant and prepared to ensure safety during your visit.

5.2 Essential Gear and Supplies

When exploring Antelope Canyon independently, it’s crucial to bring the right gear. Wear sturdy, comfortable hiking shoes for navigating uneven terrain. Carry plenty of water, sunscreen, and a hat to protect against the desert sun. A reliable map or guidebook can help you navigate the canyon’s passages. Bring a flashlight or headlamp for illuminating darker areas. Don’t forget a camera or phone with sufficient storage for capturing stunning photos. Pack light snacks to keep your energy levels up during the hike. Ensure you have a fully charged phone or portable charger for emergencies. Avoid bulky backpacks to move freely through narrow spaces.

Benefits of Guided Tours in Antelope Canyon

Guided tours offer expert insights, enhancing your experience and providing access to restricted areas, ensuring a safe and memorable exploration of Antelope Canyon.

6.1 Knowledgeable Guides and Enhanced Experience

Guided tours in Antelope Canyon offer unparalleled insights, as knowledgeable guides share the canyon’s geological history, cultural significance, and hidden gems. Their expertise enhances the experience, providing photography tips and ensuring safety. Guides navigate tricky passages, explain unique formations, and share stories about the canyon’s history, making the tour both educational and memorable. Their presence allows visitors to fully immerse in the natural beauty while gaining a deeper appreciation for this stunning wonder.

6.2 Access to Restricted Areas with Guides

Guided tours provide exclusive access to restricted areas of Antelope Canyon, such as Canyon X, offering a more immersive experience. Knowledgeable guides navigate narrow passages and hidden sections, ensuring visitors explore safely. These areas often feature unique rock formations and stunning light effects, which might be inaccessible without a guide. The expertise of guides allows visitors to discover less crowded spots, enhancing the overall adventure and making the tour truly unforgettable.

Cost of Guided Tours in Antelope Canyon

Guided tours in Antelope Canyon start at around $50 for Upper Canyon and $40 for Lower Canyon, with deluxe options up to $80, including permits and gear.

7.1 Pricing for Upper and Lower Canyon Tours

Upper Antelope Canyon tours typically range from $50 to $100 per person, depending on the tour duration and time of day. Lower Antelope Canyon tours are priced between $40 to $80, with deluxe options costing up to $100. These fees usually include the Navajo permit, entrance fees, and guide services. Some tours may offer additional amenities like photography assistance or extended exploration time, enhancing the overall experience for visitors.

7.2 What’s Included in the Tour Fee

The tour fee typically includes access to the canyon, a Navajo permit, and the services of a knowledgeable guide. Some tours also offer photography assistance, helping visitors capture optimal shots. Entrance fees and basic amenities like water and snacks may be included, depending on the tour operator. Deluxe options might provide additional perks such as extended exploration time or transportation from nearby locations, enhancing the overall value of the tour experience.

Alternative Self-Guided Options

Alternatives like kayaking or paddleboarding from Lake Powell offer unique entry methods to Antelope Canyon, allowing independent exploration of its stunning formations and natural beauty.

8.1 Kayaking to Antelope Canyon from Lake Powell

Kayaking to Antelope Canyon from Lake Powell offers a unique self-guided adventure. Start at Antelope Point launch ramp and paddle west along the rocky shore. Stay close to the left side of the channel and follow it for about a mile until you reach the canyon entrance. This method allows you to explore the canyon independently while enjoying the serene beauty of Lake Powell. A permit is required, and be cautious of flash floods. The paddle is approximately 1.6 km, making it a manageable yet memorable experience.

8.2 Paddleboarding as an Alternative Entry Method

Paddleboarding offers another unique way to explore Antelope Canyon independently. Start at Antelope Point launch ramp and glide west along the shoreline. Follow the channel for about 1.6 km until you reach the canyon entrance. This method provides a peaceful, self-guided experience, allowing you to soak in the natural beauty at your own pace. A permit is required, and be mindful of flash flood risks. Paddleboarding is an excellent alternative for those seeking a serene adventure without the crowds.

Photography Tips for Self-Guided Explorers

Capture Antelope Canyon’s stunning light beams and vibrant colors by visiting at midday. Use a tripod for stability and a polarizing filter to enhance hues. Experiment with angles to frame the unique formations, ensuring timeless shots of this natural wonder.

9.1 Capturing the Best Light Beams and Colors

Antelope Canyon’s iconic light beams are best captured during midday when sunlight pierces the canyon’s cracks; Use a tripod for stability and a polarizing filter to enhance vibrant colors. Shoot in RAW format to retain detail and adjust settings for optimal exposure. Experiment with angles to frame the light beams and canyon walls, emphasizing the dramatic interplay of light and shadow. Timing and composition are key to seizing unforgettable moments.

9.2 Recommended Camera Gear for Canyon Photography

A DSLR or mirrorless camera is ideal for capturing Antelope Canyon’s intricate details. Wide-angle lenses (10-22mm) are essential for the vastness, while a prime lens (50mm) enhances low-light shots. Carry a tripod for stability in dim lighting and a neutral density (ND) filter to manage harsh sunlight. Extra batteries, memory cards, and a polarizing filter are must-haves. Ensure your gear is lightweight and protected with a sturdy camera bag to navigate the canyon’s narrow paths effortlessly.

Antelope Canyon offers an unforgettable experience with its stunning landscapes. While self-guided tours are possible in Lower Canyon, responsible exploration is crucial. Plan carefully and fully enjoy the natural beauty.

10.1 Final Thoughts on Self-Guided vs. Guided Tours

Exploring Antelope Canyon offers a unique adventure, with self-guided tours providing flexibility for experienced visitors, while guided tours enhance the experience with expert insights and safety. Those seeking independence may opt for Lower Antelope Canyon, but guided tours are essential for Upper Antelope Canyon and Canyon X. Ultimately, the choice depends on personal preference, physical ability, and the desire for deeper understanding of the canyon’s history and geology. Responsible exploration ensures the canyon’s preservation for future generations.

10.2 Encouragement to Explore Responsibly

Responsible exploration is key to preserving Antelope Canyon’s natural beauty. Visitors should respect Navajo Nation regulations, stay on designated paths, and avoid littering or damaging the fragile environment. Refrain from touching ancient formations or engaging in vandalism. By adhering to these guidelines, you help protect the canyon for future generations. Remember, your actions impact this delicate ecosystem and its cultural significance. Explore thoughtfully and leave no trace behind.

general organic and biochemistry pdf

General‚ organic‚ and biochemistry explores chemical processes in living organisms‚ focusing on carbon-based compounds and biological molecules. It integrates foundational concepts from chemistry and biology‚ offering insights into molecular structures‚ reactions‚ and their biological significance. This field is essential for understanding life processes‚ disease mechanisms‚ and drug development‚ making it vital for health-related careers and scientific research. Resources like “General‚ Organic‚ and Biochemistry” by Bettelheim and others provide comprehensive guides‚ while free PDFs and online platforms enhance accessibility for students and researchers.

1.1 Definition and Scope of General Organic and Biochemistry

General organic and biochemistry combines the study of carbon-based compounds and their biological significance. It examines the structure‚ properties‚ and reactions of organic molecules‚ linking them to biological processes. This interdisciplinary field bridges general chemistry‚ organic chemistry‚ and biochemistry‚ focusing on molecular interactions in living systems. Its scope extends to understanding life processes‚ disease mechanisms‚ and the development of therapeutic agents‚ making it vital for medicine‚ biotechnology‚ and research. Resources like textbooks and laboratory manuals provide foundational knowledge‚ with many available as PDFs for easy access.

1.2 Importance of Studying General Organic and Biochemistry

Studying general organic and biochemistry is crucial for understanding the chemical processes that sustain life. It provides foundational knowledge for careers in healthcare‚ pharmaceuticals‚ and biotechnology. By exploring molecular interactions‚ students gain insights into disease mechanisms and drug development. This field also enables advancements in research‚ diagnostics‚ and personalized medicine. Resources like PDF textbooks and laboratory manuals support learning‚ making complex concepts accessible. The practical applications of this discipline drive innovation and improve global health‚ emphasizing its importance in modern science and medicine.

Core Concepts in General Organic Chemistry

Organic chemistry focuses on carbon-based compounds‚ exploring molecular structures‚ chemical bonds‚ and reaction mechanisms. Understanding functional groups and their properties is fundamental for analyzing organic transformations and synthesis.

2.1 Classification and Nomenclature of Organic Compounds

Organic compounds are classified based on their functional groups‚ such as alkanes‚ alkenes‚ and carbonyl compounds. Nomenclature follows IUPAC rules‚ using prefixes‚ suffixes‚ and root names to describe structures. This system ensures clarity and consistency in naming‚ enabling precise communication among scientists. Understanding classification and naming is crucial for identifying chemical properties and reactions‚ as detailed in resources like Laboratory Experiments for General‚ Organic‚ and Biochemistry and General‚ Organic‚ and Biological Chemistry textbooks available in PDF formats.

2.2 Structure and Properties of Organic Molecules

The structure of organic molecules‚ including functional groups and molecular geometry‚ determines their physical and chemical properties. Functional groups like hydrocarbons‚ alcohols‚ and carbonyl compounds influence reactivity‚ solubility‚ and biological function. Understanding these relationships is crucial for predicting behavior in chemical reactions and biological systems. Resources such as General‚ Organic‚ and Biochemistry and laboratory manuals provide detailed explanations and experimental data‚ while free PDFs and online platforms offer accessible learning tools for students and researchers in this field.

Biological Chemistry: Key Principles

Biological chemistry focuses on chemical processes in living cells‚ studying molecules like proteins‚ carbohydrates‚ and DNA. It explains metabolic pathways‚ enzyme functions‚ and energy transformations‚ linking chemistry to life processes and disease mechanisms. This field is crucial for understanding health‚ developing medicines‚ and advancing biotechnology. Resources like General‚ Organic‚ and Biochemistry and laboratory manuals provide foundational knowledge‚ while free PDFs and online guides support student learning and research in this vital area of science.

3.1 Biochemical Processes in Living Cells

Biochemical processes in living cells involve metabolic pathways‚ enzyme-catalyzed reactions‚ and energy transformations. These processes include glycolysis‚ the citric acid cycle‚ and oxidative phosphorylation‚ which produce ATP‚ the energy currency of cells. Additionally‚ biosynthesis and degradation of biomolecules like proteins‚ carbohydrates‚ lipids‚ DNA‚ and RNA are essential for cellular function. Understanding these processes is crucial for grasping how cells maintain life‚ respond to stimuli‚ and adapt to environmental changes. Textbooks like Laboratory Experiments for General‚ Organic‚ and Biochemistry and General‚ Organic‚ and Biological Chemistry by Bettelheim and Timberlake provide detailed insights into these biochemical mechanisms.

  • Metabolic pathways regulate energy production and molecular synthesis.
  • Enzymes accelerate reactions‚ ensuring efficient cellular operations.
  • Biomolecules interact dynamically to sustain life and enable growth.

3.2 Role of Biochemistry in Health and Medicine

Biochemistry plays a pivotal role in health and medicine by elucidating the molecular basis of diseases and developing therapeutic interventions. It underpins drug discovery‚ enabling the creation of targeted medications. Understanding biochemical pathways helps diagnose and treat conditions like diabetes‚ cancer‚ and genetic disorders. Additionally‚ biochemistry informs nutritional science‚ vaccine development‚ and personalized medicine. Textbooks such as General‚ Organic‚ and Biochemistry and research journals like the Russian Journal of Bioorganic Chemistry provide foundational knowledge and cutting-edge advancements in this field.

  • Biochemical insights drive drug design and disease treatment.
  • Nutritional and metabolic studies enhance health outcomes.
  • Advances in biochemistry improve diagnostic and therapeutic strategies.

Laboratory Experiments and Resources

Laboratory experiments in general organic and biochemistry involve hands-on exploration of chemical reactions and biological processes. Resources like Bettelheim’s Laboratory Experiments and Timberlake’s Manual provide structured guides. Online platforms offer supplementary materials and free PDF downloads‚ enhancing experimental learning and accessibility for students and researchers.

4.1 Essential Laboratory Techniques in Organic and Biochemistry

Essential laboratory techniques in organic and biochemistry include chromatography‚ distillation‚ and spectroscopy for analyzing compounds. Biochemical methods involve enzyme assays‚ protein purification‚ and DNA extraction. These skills are vital for understanding chemical and biological principles. Resources like Bettelheim’s Laboratory Experiments and Timberlake’s Manual provide detailed protocols. Such techniques are applied in research‚ quality control‚ and medical diagnostics‚ ensuring accurate and reproducible results. They also prepare students for advanced experiments in both organic and biochemistry fields.

4.2 Recommended Laboratory Manuals and Guides

Recommended laboratory manuals for general‚ organic‚ and biochemistry include Bettelheim’s Laboratory Experiments and Timberlake’s Manual for Chemistry. These guides provide detailed protocols for experiments‚ ensuring safe and accurate practices. They cover essential techniques like chromatography and spectroscopy‚ with step-by-step instructions. Additional resources like the Advanced Laboratory Manual of Organic Chemistry and biochemistry-focused manuals offer specialized methods. These manuals are indispensable for students and educators‚ supporting both classroom and self-study environments effectively.

Applications of General Organic and Biochemistry

General organic and biochemistry applies to health-related careers‚ drug development‚ and understanding biological processes. It aids in advancing medical research‚ agricultural practices‚ and environmental sustainability‚ impacting daily life significantly.

5.1 Applications in Health-Related Careers

General organic and biochemistry is crucial for health-related careers‚ enabling professionals to understand disease mechanisms‚ drug interactions‚ and biological processes. It aids in developing pharmaceuticals‚ diagnosing conditions‚ and advancing medical research. Resources like General‚ Organic‚ and Biochemistry by Bettelheim provide foundational knowledge‚ while laboratory manuals and study guides support practical skills. These tools prepare students for roles in medicine‚ nursing‚ and public health‚ ensuring a strong scientific understanding for real-world applications in healthcare and research.

5.2 Advances in Research and Industry

General organic and biochemistry drives advancements in research and industry by providing foundational knowledge for drug discovery‚ biotechnology‚ and material science. Laboratory manuals and resources like Bettelheim’s texts support cutting-edge research in organic chemistry labs. The field aids in developing new pharmaceuticals‚ agricultural chemicals‚ and green chemistry solutions. PDF guides and online platforms enable access to the latest methodologies‚ fostering innovation and collaboration. These advancements contribute to breakthroughs in biotechnology‚ medical diagnostics‚ and sustainable technologies‚ shaping the future of science and industry.

Textbooks and Reference Materials

Popular textbooks include General‚ Organic‚ and Biochemistry by Bettelheim and General‚ Organic‚ and Biological Chemistry by H. Stephen Stoker. These texts‚ available in PDF‚ provide comprehensive coverage of core concepts‚ supported by study guides and solutions manuals. Supplementary materials like laboratory manuals enhance practical learning‚ while online platforms offer accessible resources for students and researchers.

6.1 Popular Textbooks for General‚ Organic‚ and Biological Chemistry

Key textbooks include General‚ Organic‚ and Biochemistry by Bettelheim‚ Brown‚ Campbell‚ Farrell‚ and Torres‚ and General‚ Organic‚ and Biological Chemistry by H. Stephen Stoker. These texts are widely used for their clear explanations and integrated approaches. Many editions‚ such as the 12th and 11th editions‚ are available as free PDF downloads‚ making them accessible for students. These resources provide comprehensive coverage of chemical structures‚ reactions‚ and biological applications‚ making them indispensable for both undergraduate studies and professional reference.

6.2 Supplementary Study Guides and Solutions Manuals

Supplementary study guides and solutions manuals‚ such as the Study Guide and Selected Solutions Manual for General‚ Organic‚ and Biological Chemistry‚ provide additional support for students. These resources offer detailed explanations‚ practice problems‚ and worked-out solutions‚ enhancing understanding and problem-solving skills. Many manuals‚ like those accompanying the 5th and 11th editions of popular textbooks‚ are available as free PDF downloads‚ making them accessible for self-study and exam preparation. They are invaluable tools for mastering complex concepts and reinforcing learning.

Digital Resources and PDF Availability

Digital resources‚ including free PDFs of textbooks like General‚ Organic‚ and Biochemistry by Bettelheim‚ are widely available online‚ supporting students and researchers with accessible study materials.

7.1 Free PDF Downloads of Key Textbooks

Free PDF downloads of textbooks like General‚ Organic‚ and Biochemistry (12th Edition) by Bettelheim and General‚ Organic‚ and Biochemistry (11th Edition) by Katherine Denniston are available online. These resources provide comprehensive coverage of core concepts‚ including organic compounds‚ biochemical processes‚ and molecular structures. Platforms like OWL and university repositories offer accessible study materials‚ benefiting students and researchers. These PDFs are often accompanied by study guides and solutions manuals‚ enhancing learning and preparation for exams in health-related fields and advanced scientific studies.

7.2 Online Platforms for Accessing Educational Materials

Online platforms like OWL and university repositories provide easy access to educational materials for general‚ organic‚ and biochemistry. These platforms offer free PDF downloads of textbooks‚ laboratory manuals‚ and study guides. Additionally‚ the Russian Journal of Bioorganic Chemistry and other scientific databases host a wealth of articles and resources. Students and researchers can also find supplementary materials‚ such as solutions manuals and integrated study guides‚ to enhance their learning experience and prepare for exams in health-related and advanced scientific fields.

The study of general‚ organic‚ and biochemistry continues to evolve‚ with advancements in computational modeling and interdisciplinary research. Future trends include the integration of machine learning in drug design and personalized medicine‚ revolutionizing health-related fields. Educational resources‚ such as free PDFs and online platforms‚ are becoming more accessible‚ fostering a global learning community and preparing students for emerging challenges in biochemistry and beyond.

8.1 Evolution of Teaching Methods in General Organic and Biochemistry

Teaching methods in general‚ organic‚ and biochemistry have advanced significantly‚ incorporating digital tools and interactive platforms. Online resources like OWL and free PDF textbooks now complement traditional teaching‚ enhancing student engagement. Virtual labs and simulations allow hands-on practice without physical lab access. Adaptive learning systems personalize education‚ catering to individual student needs. These innovations ensure a more dynamic and accessible learning experience‚ preparing future scientists for the challenges of modern biochemistry and related fields effectively.

8.2 Emerging Topics and Research Areas

Emerging topics in general‚ organic‚ and biochemistry include advanced bioorganic synthesis‚ enzyme engineering‚ and molecular biology. Research focuses on green chemistry‚ sustainable materials‚ and personalized medicine. Biochemical studies explore cellular processes‚ metabolic pathways‚ and disease mechanisms. Digital resources like free PDFs and online platforms provide access to cutting-edge research‚ fostering innovation. These advancements drive progress in health-related fields and industrial applications‚ ensuring continued growth in scientific discovery and practical applications.

2017 toyota highlander manual

The 2017 Toyota Highlander Manual is a comprehensive guide essential for understanding vehicle operation, maintenance, and troubleshooting․ It ensures safety, proper care, and optimal performance․

Overview of the Manual’s Purpose and Content

The 2017 Toyota Highlander Manual provides detailed instructions for vehicle operation, maintenance, and troubleshooting․ It includes sections on safety features, instrument panel explanations, and maintenance schedules․ The manual also offers visual guides and diagrams to help owners understand complex systems․ Its purpose is to ensure optimal performance, safety, and longevity of the vehicle, making it an indispensable resource for every Highlander owner․

Importance of the 2017 Toyota Highlander Manual

The 2017 Toyota Highlander Manual is crucial for ensuring optimal vehicle performance, safety, and longevity․ It provides essential guidance on operation, maintenance, and troubleshooting, helping owners prevent issues and enhance driving experiences․ With detailed instructions and visual aids, the manual empowers owners to make informed decisions, reducing repair costs and extending the vehicle’s lifespan․

Why Every Owner Should Have the Manual

Owning the 2017 Toyota Highlander Manual ensures comprehensive understanding of your vehicle’s features, maintenance needs, and troubleshooting solutions․ It provides clear instructions for customizing settings, interpreting warning lights, and performing routine checks․ The manual empowers owners to address issues promptly, avoid costly repairs, and maintain optimal performance․ Its detailed guides and safety information are indispensable for maximizing driving confidence and extending the vehicle’s lifespan․

Troubleshooting Tips and Solutions

The 2017 Toyota Highlander Manual offers detailed troubleshooting tips to address common issues quickly․ It provides guidance on identifying warning lights, resolving mechanical problems, and resetting maintenance notifications․ With step-by-step solutions, owners can diagnose and fix issues independently, saving time and money․ The manual ensures drivers are prepared for unexpected problems, promoting safety and reliability on the road․

Maintenance Schedules and Guidelines

The 2017 Toyota Highlander Manual provides detailed maintenance schedules to ensure optimal vehicle performance․ It outlines routine checks, fluid replacements, and tire pressure guidelines․ Owners can follow recommended timelines for services like oil changes and filter replacements․ Adhering to these schedules helps prevent wear and tear, extends the vehicle’s lifespan, and maintains warranty compliance․ Regular maintenance ensures reliability, safety, and efficiency, keeping the Highlander in peak condition․

Types of Manuals Available for the 2017 Toyota Highlander

Types of manuals for the 2017 Toyota Highlander include Owner’s, Quick Reference, and Warranty guides, available in PDF for download or access via Toyota’s website for maintenance and operation guidance․

Quick Reference Manual

The 2017 Toyota Highlander Quick Reference Manual provides a concise guide to essential features, controls, and basic troubleshooting․ Available as a PDF, it covers instrument panel diagrams, indicator symbols, and common maintenance tasks․ This manual is designed for easy access, offering quick solutions and clarity for everyday vehicle operations․ It complements the Owner’s Manual, ensuring drivers can swiftly address routine questions or issues without extensive searching․

  • Covers essential vehicle controls and features․
  • Includes instrument panel and indicator explanations․
  • Offers basic troubleshooting guidance․
  • Available in PDF format for easy access․

Owner’s Manual

The 2017 Toyota Highlander Owner’s Manual is a detailed guide providing comprehensive information on vehicle operation, maintenance, and troubleshooting․ Spanning 732 pages, it covers everything from safety features to technical specifications․ Available in PDF format, this manual ensures owners can easily access critical information, making it an indispensable resource for optimal vehicle care and performance․

  • Covers vehicle operation and maintenance․
  • Includes safety features and technical details․
  • Available as a downloadable PDF․
  • Essential for proper vehicle care․

Warranty and Maintenance Guide

The 2017 Toyota Highlander Warranty and Maintenance Guide outlines service agreements and plans, such as Toyota Financial Services and Toyota Care Plus․ It provides detailed schedules for routine maintenance, ensuring optimal vehicle performance․ This guide helps owners understand coverage terms and recommended service intervals, offering peace of mind and extending the vehicle’s lifespan․

  • Includes Toyota Financial Services plans․
  • Detailed maintenance schedules․
  • Coverage terms and service intervals․
  • Extends vehicle lifespan․

How to Access the 2017 Toyota Highlander Manual

The 2017 Toyota Highlander Manual can be downloaded as a PDF from Toyota’s official website or obtained in physical form from authorized dealers for easy and convenient access to ensure proper vehicle maintenance․

Downloading the PDF Version

Downloading the 2017 Toyota Highlander Manual as a PDF is quick and easy․ Visit Toyota’s official website or trusted databases like CarManualsOnline․info․ The PDF format allows you to access the manual anytime, even without internet․ It is free, convenient, and ensures you have all the necessary information at your fingertips for easy reference, printing, or sharing when needed․

Accessing the Manual via Toyota’s Official Website

Visit Toyota’s official website to access the 2017 Highlander manual․ Navigate to the “My Toyota” section, enter your vehicle details, and search for the manual․ The PDF is available for free, offering comprehensive information on maintenance, troubleshooting, and features․ This method ensures you have the most accurate and up-to-date guide for your vehicle, directly from the manufacturer․

Obtaining a Physical Copy from Authorized Dealers

For a physical copy of the 2017 Toyota Highlander Manual, visit an authorized Toyota dealership․ Dealerships typically provide printed manuals upon request, ensuring you have a tangible guide for easy reference․ This method is ideal for those who prefer a hard copy, offering detailed information on vehicle operation, maintenance, and troubleshooting directly from Toyota․

Key Features of the 2017 Toyota Highlander Manual

The 2017 Toyota Highlander Manual offers a comprehensive guide, covering vehicle operation, maintenance, troubleshooting, and safety․ It features detailed sections and visual aids for easy understanding․

Comprehensive Table of Contents

The 2017 Toyota Highlander Manual features a detailed table of contents, organizing information into logical sections․ It covers vehicle operation, maintenance schedules, troubleshooting, and safety guidelines․ The table of contents is user-friendly, allowing owners to quickly locate specific topics such as instrument panel explanations, tire maintenance, and fluid checks․ This structure ensures easy navigation, making the manual an invaluable resource for proper vehicle care and understanding․

Visual Guides and Diagrams

The 2017 Toyota Highlander Manual includes detailed visual guides and diagrams to help owners understand complex systems․ These visuals cover topics like the instrument panel, tire pressure monitoring, and fluid checks․ Clear illustrations of dashboard indicators and maintenance procedures ensure easy comprehension․ Diagrams also assist with troubleshooting, providing a visual reference for common issues and repairs․ This enhances the manual’s usability, making it a practical tool for both novice and experienced drivers․

Important Warnings and Cautions

The 2017 Toyota Highlander Manual highlights critical safety information to ensure safe vehicle operation․ It emphasizes proper handling of components like brakes, airbags, and seatbelts․ Warnings about ignoring dashboard indicators or improper fluid handling are stressed to prevent damage or risks․ The manual also cautions against overheating, child safety restraints, and towing limits․ Adhering to these guidelines is essential for maintaining safety and extending the vehicle’s lifespan․

Maintenance and Service Information

The manual provides detailed maintenance schedules, tire pressure guidelines, and fluid replacement intervals․ It outlines essential service checks to ensure optimal vehicle performance and longevity․

Routine Maintenance Schedule

The manual outlines a detailed routine maintenance schedule, including oil changes, tire rotations, and brake inspections․ Services are recommended at specific mileage intervals, such as every 5,000 to 7,500 miles․ Annual checks for battery health, belts, and fluids are also emphasized․ Adhering to this schedule ensures optimal vehicle performance, prevents potential issues, and aligns with Toyota’s recommendations for extending the Highlander’s lifespan․ Refer to the manual for exact intervals and procedures․

Tire Pressure and Maintenance

The manual provides detailed guidelines for maintaining proper tire pressure, emphasizing safety and efficiency․ It recommends checking pressure monthly and before long trips, using the specified values in the manual․ Regular tire rotations and inspections for wear are also advised․ Proper inflation enhances fuel efficiency, handling, and tire longevity․ The guide outlines steps for correcting under-inflated tires and addresses seasonal adjustments for optimal performance․ Adhere to these recommendations to ensure tire durability and vehicle stability․

Fluid Check and Replacement Guidelines

The manual outlines essential fluid check and replacement procedures to maintain the 2017 Toyota Highlander’s performance and longevity․ It specifies recommended intervals for oil, coolant, transmission, and brake fluid changes․ Proper fluid levels ensure optimal engine function, prevent overheating, and maintain braking efficiency․ The guide advises using Toyota-approved fluids to avoid damage․ Regular checks and timely replacements are crucial for preventing mechanical failures and ensuring reliable vehicle operation․ Follow the manual’s schedule to maintain peak performance and avoid costly repairs․

Troubleshooting Common Issues

The manual provides detailed steps to diagnose and resolve common problems, such as warning lights, mechanical issues, and electrical malfunctions, ensuring quick and effective solutions;

Identifying Warning Lights and Indicators

The manual explains warning lights and indicators on the instrument panel, providing clear descriptions and diagrams․ This helps drivers quickly identify issues, from engine problems to safety system alerts․ Understanding these indicators ensures proper responses to maintain safety and prevent potential damage․ Detailed explanations guide owners to address concerns promptly, ensuring optimal vehicle performance and longevity․ This section is crucial for safe driving practices and maintaining the Highlander’s reliability․

Common Problems and DIY Fixes

The manual highlights common issues and provides DIY solutions for the 2017 Toyota Highlander․ It covers routine checks, such as oil changes and tire pressure monitoring, and offers step-by-step guides for resolving minor problems like replacing air filters or addressing dashboard alerts․ Detailed explanations empower owners to handle simple fixes independently, reducing reliance on mechanics and saving costs․ This section ensures owners can maintain their vehicle effectively and address issues promptly․

Resetting Maintenance and Other Notifications

The 2017 Toyota Highlander Manual provides clear instructions for resetting maintenance notifications and other alerts․ It outlines step-by-step procedures to clear service reminders and dashboard notifications post-servicing․ This ensures drivers stay informed about their vehicle’s status without unnecessary alarms․ The manual also covers resetting settings like trip meters and customizable features, helping owners maintain accurate records and personalized preferences․ This section is essential for keeping the vehicle’s systems up to date and functioning correctly․

Driver-Specific Information

The 2017 Toyota Highlander Manual offers insights into safe driving practices and customizing vehicle settings․ It helps drivers optimize their experience, ensuring comfort and control on the road․

Safe Driving Practices

The 2017 Toyota Highlander Manual emphasizes safe driving practices, including proper vehicle inspection, adherence to traffic laws, and use of safety features like seat belts and electronic stability control․ It also highlights the importance of maintaining a safe following distance, avoiding distractions, and being aware of road conditions․ Regular checks of tire pressure, brakes, and lights are recommended to ensure optimal vehicle performance and passenger safety on the road․

Customizing Your Vehicle Settings

The 2017 Toyota Highlander Manual provides guidance on customizing vehicle settings to suit individual preferences․ Adjustments such as seat positioning, climate control, and audio settings can be personalized for comfort and convenience․ The manual also explains how to program preferences for lighting, door locks, and instrument panel displays, ensuring a tailored driving experience that enhances comfort and accessibility for all users․

Additional Resources

Additional resources for the 2017 Toyota Highlander include repair manuals, technical guides, Toyota customer support, and online forums for troubleshooting, customization, and maintenance tips․

Repair Manuals and Technical Guides

Repair manuals and technical guides for the 2017 Toyota Highlander provide detailed instructions for diagnostics, repairs, and maintenance․ They include wiring diagrams, part lists, and step-by-step procedures․ These resources are available for download in PDF format or accessible via Toyota’s Technical Information System (TIS)․ Authorized dealers and online forums also offer additional repair guides, ensuring comprehensive support for DIY enthusiasts and professional mechanics alike․

Toyota Customer Support and Contact Information

Toyota offers dedicated customer support to assist with inquiries about the 2017 Highlander manual․ Owners can contact Toyota directly via phone at (800) 782-4356 or visit their official website for additional resources․ The Toyota Technical Information System (TIS) provides access to detailed repair manuals and guides․ Customer support is available to address questions, concerns, or requests for physical copies of the manual, ensuring owners have all the information they need․

Online Communities and Forums

Online communities and forums provide valuable resources for 2017 Toyota Highlander owners․ Websites like CarManualsOnline․info offer free access to manuals and guides, while forums allow owners to share experiences, ask questions, and access DIY repair tips․ These platforms foster peer-to-peer support, enabling owners to troubleshoot issues and gain insights from fellow drivers․ They serve as a complementary resource to the official manual, enhancing overall vehicle understanding and maintenance․

david hamilton pdf

David Hamilton‚ a renowned British photographer and filmmaker‚ captured ethereal beauty through soft-focus imagery and muted tones. His work‚ available in PDFs like The Age of Innocence and A Place in the Sun‚ explores themes of innocence and femininity‚ blending artistry with emotional depth.

Overview of David Hamilton’s Contribution to Photography

David Hamilton’s photography stands as a testament to his unique vision and mastery of light and composition. His work‚ widely available in PDF formats like The Age of Innocence and A Place in the Sun‚ captures the essence of femininity and innocence through soft-focus techniques and muted tones. Hamilton’s ability to evoke deep emotional resonance in his imagery has left a lasting impact on the world of photography. His contributions not only defined an era but also influenced countless photographers and artists. By blending fine art with commercial success‚ Hamilton bridged the gap between creative expression and popular appeal‚ ensuring his work remains timeless and widely admired.

The Significance of His Photography Books

David Hamilton’s photography books‚ such as The Age of Innocence and A Place in the Sun‚ are celebrated for their artistic depth and emotional resonance. These works‚ available in PDF formats‚ showcase Hamilton’s ability to capture the essence of his subjects through soft-focus imagery and muted tones. His books have not only defined his career but also played a crucial role in shaping the landscape of fine art photography. By exploring themes of innocence and femininity‚ Hamilton’s publications have become iconic‚ offering a window into his unique aesthetic. Their widespread availability in digital formats ensures that his art continues to inspire new generations of photographers and art enthusiasts alike‚ solidifying his legacy as a visionary photographer.

Early Life and Influences

David Hamilton‚ born in London in 1933‚ was evacuated to Dorset during WWII‚ where he developed an appreciation for natural beauty. Post-war‚ he pursued education and photography‚ laying the groundwork for his artistic career.

David Hamilton’s Childhood and Evacuation During WWII

David Hamilton was born in London in 1933. During World War II‚ he was evacuated to Dorset‚ a rural region in southwest England‚ to escape the bombing. This experience exposed him to the serene landscapes and natural beauty of the countryside‚ which may have influenced his later photographic style. After the war‚ Hamilton returned to London‚ where he completed his education. His early life‚ marked by the contrasts of urban disruption and rural tranquility‚ laid the foundation for his artistic sensibility. These formative years played a pivotal role in shaping his unique perspective on beauty and the natural world.

His Education and Early Interest in Photography

Following his return to London after World War II‚ David Hamilton pursued his education‚ developing a keen interest in photography. His early fascination with the medium was nurtured during his school years‚ where he began experimenting with cameras and techniques. Hamilton’s formal education provided a solid foundation‚ but it was his self-driven exploration of photography that truly ignited his passion. He spent countless hours studying the works of other photographers and honing his skills‚ which eventually led to his distinctive style. This period marked the beginning of his journey as an artist‚ blending technical proficiency with a deep appreciation for aesthetic beauty.

Photographic Style and Techniques

David Hamilton’s style is distinguished by soft-focus imagery and muted tones‚ creating a dreamlike atmosphere. His techniques emphasize natural light and composition‚ capturing timeless‚ ethereal beauty in his subjects. His work often features flowing lines and delicate forms‚ reflecting his artistic approach to photography. Hamilton’s use of soft focus and careful composition has become iconic‚ blending technical skill with emotional depth. His photographs are renowned for their ability to evoke a sense of nostalgia and grace‚ making his style uniquely recognizable. This approach has influenced many photographers and continues to be celebrated in his PDF collections and exhibitions. His techniques remain a testament to his artistic vision and mastery of the medium.

Soft Focus and Muted Colors in His Work

David Hamilton’s photography is characterized by soft focus and muted colors‚ creating a dreamlike atmosphere. His use of soft focus softens sharpness‚ adding warmth and intimacy to his images. Muted tones enhance the ethereal quality of his work‚ blending seamlessly with his exploration of themes like innocence and femininity. Natural light plays a crucial role‚ as Hamilton often captures his subjects in softly illuminated settings‚ further emphasizing the delicate beauty of his compositions. This distinctive style has become iconic‚ making his photographs instantly recognizable. His approach to soft focus and color has influenced many photographers and remains a hallmark of his artistic legacy‚ as seen in his PDF collections like The Age of Innocence. The combination of these techniques contributes to the timeless‚ emotive quality of his work.

The Use of Natural Light and Composition

David Hamilton masterfully utilized natural light to create soft‚ diffused effects in his photographs‚ enhancing the delicate forms of his subjects. His compositions often featured simple backgrounds‚ allowing the human form to take center stage. The interplay of light and shadow added depth and elegance to his work‚ while the careful arrangement of elements within the frame ensured balance and harmony. Hamilton’s ability to capture the subtleties of natural illumination complemented his exploration of themes like innocence and beauty. This approach‚ combined with his signature soft focus‚ resulted in images that exuded warmth and intimacy. His use of natural light and composition remains a defining aspect of his artistic style‚ as seen in his PDF collections like The Age of Innocence.

Notable Publications and PDF Availability

David Hamilton’s works‚ such as The Age of Innocence and A Place in the Sun‚ are widely available as PDFs‚ showcasing his artistic vision and timeless photography.

“The Age of Innocence” and Its Impact

The Age of Innocence is one of David Hamilton’s most celebrated photography books‚ showcasing his unique ability to capture fleeting moments of youthful beauty. The book‚ available as a PDF‚ reflects Hamilton’s artistic vision‚ blending soft focus and muted tones to evoke a sense of timelessness. It captures the essence of innocence and vulnerability‚ themes that resonate deeply with audiences. The publication gained widespread acclaim for its emotional depth and aesthetic appeal. Hamilton’s work in The Age of Innocence is often praised for its ability to transcend mere photography‚ becoming a poetic reflection of human experience. This book remains a cornerstone of his legacy‚ illustrating his mastery of conveying complex emotions through imagery. Its impact endures‚ making it a sought-after piece among art enthusiasts and collectors.

“A Place in the Sun” Photography Art eBook

A Place in the Sun is a captivating photography art eBook by David Hamilton‚ showcasing his signature soft-focus style and muted color palette. This collection highlights Hamilton’s ability to weave narratives through his images‚ capturing moments of grace and simplicity. The eBook‚ widely available as a PDF‚ offers a glimpse into his artistic philosophy‚ blending light‚ composition‚ and the human form. It reflects his deep connection to natural beauty and his ability to evoke emotions through visual storytelling. As one of his notable works‚ A Place in the Sun continues to inspire photographers and art enthusiasts‚ solidifying Hamilton’s legacy as a master of aesthetic photography. Its availability in digital format ensures his art remains accessible to a modern audience.

Filmmaking and Cultural Impact

David Hamilton transitioned into filmmaking‚ directing five feature films that reflected 1970s societal shifts. His work captured the era’s freedom and exploration‚ resonating deeply with audiences.

David Hamilton’s Transition to Filmmaking

David Hamilton’s shift from photography to filmmaking marked a natural progression‚ as his visual storytelling seamlessly translated to the screen. His films‚ such as Bilitis and Tender Cousins‚ mirrored his photographic style‚ emphasizing soft focus‚ muted tones‚ and a romanticized portrayal of youth. Hamilton’s cinematic work often explored themes of innocence‚ desire‚ and the complexities of human relationships‚ resonating with the liberated spirit of the 1970s. His filmmaking career‚ though less prolific than his photography‚ left an indelible mark on the era‚ blending artistic sensuality with narrative depth. Despite controversy‚ Hamilton’s films remain a testament to his ability to capture the essence of his subjects‚ much like his photography.

His Films as a Reflection of 1970s Society

David Hamilton’s films‚ such as Bilitis and Tender Cousins‚ encapsulated the spirit of 1970s society‚ reflecting its liberation and exploration of newfound freedoms. His cinematographic style‚ characterized by soft focus and natural light‚ mirrored the era’s fascination with youth‚ beauty‚ and sensuality. Themes of innocence‚ desire‚ and complex relationships resonated with audiences‚ aligning with the decade’s shifting moral boundaries. Hamilton’s work often blurred the lines between art and eroticism‚ sparking both acclaim and controversy. His films‚ much like his photography‚ became a visual poetry of their time‚ capturing the essence of a society in transition. This duality of artistic expression and cultural reflection solidified his legacy as a chronicler of the 1970s’ evolving values and aesthetics.

Exhibitions and Recognition

David Hamilton’s work gained widespread recognition through exhibitions‚ notably his 1977 show at Images Gallery. His photographs and films were celebrated for their artistic and cultural impact.

Notable Exhibitions‚ Including the 1977 Images Gallery Show

David Hamilton’s work gained significant recognition through various exhibitions‚ with the 1977 Images Gallery Show in New York being a landmark event. This exhibition showcased his signature soft-focus style and muted tones‚ capturing the essence of femininity and innocence. The show highlighted his ability to blend artistic photography with emotional depth‚ drawing widespread acclaim. His exhibitions often featured prints from his renowned photography books‚ such as The Age of Innocence and A Place in the Sun‚ which are now available as PDFs. These displays not only solidified his reputation as a master photographer but also reflected his cultural impact during the 1970s. Hamilton’s exhibitions remain a testament to his artistic vision and enduring influence.

Awards and Public Acclaim

David Hamilton’s work garnered significant public acclaim‚ particularly during the 1970s‚ as his photography and films captured the essence of the era’s cultural shifts. While specific awards details are scarce‚ his widespread recognition underscores his influence. His ability to evoke emotion through soft-focus techniques and muted tones earned him admiration‚ though some critics focused on the provocative nature of his subjects. Despite this‚ his artistic vision and technical skill were widely acknowledged‚ solidifying his legacy in both photography and filmmaking. His work continues to be celebrated for its timeless quality and emotional depth‚ reflecting a unique perspective on femininity and innocence. Hamilton’s acclaim highlights his enduring impact on visual art and culture.

indesit washer dryer iwde126 manual

This manual provides essential guidance for the Indesit IWDE126 washer dryer, covering installation, safety, cycle options, troubleshooting, and maintenance to ensure optimal performance and user safety.

1.1 Overview of the IWDE126 Model

The Indesit IWDE126 is a versatile washer dryer designed for efficient laundry management. It combines washing and drying functions in one unit, offering convenience for users with limited space. The model features multiple wash cycles, energy-efficient operation, and a robust design. Key components like the drum pulley ensure smooth operation, while original parts like the C00199343 drum pulley are readily available for maintenance. With a focus on reliability, the IWDE126 is backed by a warranty, ensuring customer satisfaction and support. Its compact design and advanced features make it a practical choice for modern households.

1.2 Importance of Reading the Manual

Reading the Indesit IWDE126 manual is crucial for understanding its features, operation, and maintenance. It provides essential guidance on safety precautions, cycle customization, and troubleshooting common issues. The manual helps users optimize performance, prevent errors, and ensure safe usage. By following the instructions, users can extend the appliance’s lifespan and avoid costly repairs. Additionally, the manual includes details on replacing parts, such as the C00199343 drum pulley, and outlines warranty terms for added peace of mind. Proper usage, as explained in the manual, ensures efficiency, reliability, and longevity of the washer dryer, making it a valuable resource for all users.

Installation and Setup

Proper installation ensures safe and efficient operation. Level the appliance, connect water and power supplies, and ensure ventilation. Follow manual guidelines for correct setup and functionality.

2.1 Pre-Installation Requirements

Before installing the Indesit IWDE126, ensure the location is level, well-ventilated, and near water and power supplies. Verify all parts, like the drum pulley, are intact. Consult the manual for specific electrical and plumbing needs. Check for any damage or wear on components like the drum belt and ensure they are compatible with the model. Measure the space to fit the appliance dimensions. Prepare tools and materials as recommended. Review safety guidelines to avoid installation hazards. Ensure proper ventilation to prevent moisture buildup during drying cycles. Plan the layout to facilitate easy access for future maintenance or repairs.

2.2 Step-by-Step Installation Guide

Unpack the IWDE126 and ensure all components are undamaged. Position the appliance on a level surface, ensuring proper ventilation. Connect the water supply hoses to the machine and water inlet; Plug in the power cord, ensuring the outlet meets the required voltage. Level the machine using adjustable feet to prevent vibration. Secure the drain hose to a nearby drainpipe. Test a short wash cycle to ensure proper function. Refer to the manual for specific instructions on connecting the drum pulley or replacing parts like the C00199343 drum pulley if necessary. Ensure all connections are tight and safe.

Safety Precautions

Always follow the manual’s guidelines to avoid accidents. Keep children away from the appliance. Ensure proper ventilation and avoid overloading. Regularly inspect and replace worn parts like the drum pulley to maintain safety and efficiency.

3.1 General Safety Guidelines

Always read the manual carefully before using the Indesit IWDE126. Ensure children are kept away from the appliance. Avoid overloading and never operate the washer dryer near water. Regularly inspect and replace worn parts, such as the drum pulley, to prevent accidents. Ensure proper installation and leveling to maintain stability. Never use damaged or incompatible accessories. Keep the area around the appliance clear and well-ventilated; Follow the recommended load guidelines to avoid imbalance issues. Regular maintenance, like cleaning filters, is essential for safe and efficient operation. Always unplug the machine before performing any maintenance tasks.

3;2 Safety Features of the IWDE126

The Indesit IWDE126 is equipped with advanced safety features to protect users and ensure reliable operation. It includes a child lock to prevent accidental starts and unauthorized access. The appliance also features automatic shut-off in case of malfunction or overload. Sensors monitor balance and temperature, reducing risks of damage or accidents. The washer dryer includes secure locking mechanisms to prevent door opening during operation. Additionally, it has thermal protection to avoid overheating. Error codes provide clear indicators of potential issues, allowing for timely resolutions. These features ensure a safe and efficient laundry experience for all users.

Cycle Options and Customization

Explore various wash and dry cycles tailored for different fabrics, from delicate to heavy-duty loads. Customize settings like temperature, spin speed, and drying time for optimal results.

4.1 Understanding Different Wash Cycles

The Indesit IWDE126 offers multiple wash cycles designed for specific needs. Delicate fabrics benefit from a gentle cycle with lower temperatures and reduced agitation. Heavy-duty cycles tackle thick fabrics and tough stains with intense agitation and higher heat. Eco cycles save energy and water, ideal for smaller or less soiled loads. Special cycles like wool or silk settings ensure delicate items are protected. Each cycle can be adjusted for water temperature, spin speed, and additional rinse options, providing flexibility to meet various laundry requirements efficiently. Regular updates and specific care options enhance performance and fabric longevity.

4.2 Customizing Wash and Dry Settings

The Indesit IWDE126 allows users to tailor wash and dry settings to suit specific needs. Temperature, spin speed, and drying time can be adjusted for optimal results. The eco-mode reduces energy consumption, while the silent operation minimizes noise. Additional options like pre-wash and extra rinse ensure thorough cleaning. Customizable drying levels prevent over-drying, protecting fabrics. Advanced sensors automatically detect load size and adjust settings for efficiency. These features provide flexibility and precision, ensuring clothes are cleaned and dried to perfection while maintaining energy efficiency and fabric care. Regular updates enhance customization options for improved performance.

Troubleshooting Common Issues

This section helps identify and resolve common problems with the IWDE126, such as error codes, poor washing performance, or drum not turning, ensuring quick and effective solutions.

5.1 Identifying Common Problems

Common issues with the Indesit IWDE126 include error codes, poor washing performance, or the drum not turning. These problems often arise from blockages, incorrect detergent use, or improper loading. Users may encounter error codes like E20 or E30, indicating drainage or sensor issues. Regular maintenance, such as cleaning filters and checking hoses, can prevent many problems. If issues persist, consulting the manual or contacting customer support is recommended for accurate diagnosis and solutions. Early identification of these problems ensures efficient troubleshooting and prolongs the appliance’s lifespan. Always refer to the manual for specific guidance on addressing these common issues effectively.

5.2 Error Codes and Their Solutions

The Indesit IWDE126 displays error codes to indicate specific issues. For example, E20 often signifies a drainage problem, while E30 may point to a sensor malfunction. To resolve these, check the drain filter, ensure proper detergent dosage, and verify sensor connections. Other codes like E40 or E50 may indicate more complex issues requiring professional attention. Always refer to the manual for detailed explanations and step-by-step solutions. Regular maintenance, such as cleaning filters and checking hoses, can prevent many of these errors. Addressing these codes promptly ensures optimal performance and extends the appliance’s lifespan.

Maintenance and Cleaning

Regular cleaning of filters and checking hoses ensures optimal performance. Cleaning the drum and gasket prevents mold buildup. Maintenance extends the appliance’s lifespan and efficiency.

6.1 Regular Maintenance Tips

Regular maintenance ensures optimal performance of your Indesit IWDE126. Check and clean the filter after each use to improve efficiency. Clean the gasket to prevent mold buildup. Inspect hoses for damage and replace if necessary. Leave the door open after cycles to dry the interior. Regularly check the drum for residue and run a cleaning cycle. Ensure proper ventilation in the room. Replace worn-out parts promptly, such as seals or belts. Schedule annual professional checks for internal components. Follow these tips to maintain your washer dryer’s functionality and extend its lifespan.

6.2 Deep Cleaning the Washer Dryer

Deep cleaning your Indesit IWDE126 washer dryer involves running a cleaning cycle with a detergent booster or vinegar. Remove and clean the detergent drawer and filter. Wipe the tub and gasket with a mild bleach solution to eliminate odors and mold. Check for lint buildup in the dryer compartment and vacuum it out. Inspect internal hoses for blockages and ensure drainage is clear. Regular deep cleaning prevents residue accumulation and maintains hygiene. Perform this process every 1-2 months for optimal performance and freshness. Always refer to the manual for specific cleaning cycle settings.

Parts Replacement and Repair

Identify faulty components like belts or sensors and replace them with original Indesit parts. Ensure to unplug the machine before starting repairs. Use genuine spare parts for reliability and safety, as counterfeit items may void the warranty. Refer to the manual for compatible replacements. If unsure, consult a professional technician to avoid further damage. Always follow the manufacturer’s guidelines for repairs to maintain performance and longevity of your IWDE126 washer dryer. Regular maintenance can prevent major repairs and extend the appliance’s lifespan significantly. Keep all receipts for warranty claims and ensure all repairs adhere to safety standards. This ensures your washer dryer operates efficiently and safely for years to come. Always check for any recalls or updates from Indesit to ensure your appliance is up-to-date with the latest improvements.

7.1 Identifying Replaceable Parts

Identify replaceable parts such as belts, sensors, and seals in your Indesit IWDE126. These components are essential for optimal performance and may need replacement over time due to wear. Always use original Indesit parts to ensure compatibility and maintain warranty validity. Consult the manual or manufacturer’s website for a detailed parts list. Regular inspection can help detect worn-out parts early, preventing major breakdowns. DIY replacements are possible for some parts, but complex repairs may require professional assistance. Proper identification ensures safety and efficiency when performing maintenance or repairs on your washer dryer. Keep track of model-specific parts to avoid mismatches. This helps maintain the appliance’s functionality and extends its lifespan. Always refer to the user manual for guidance on identifying and replacing parts correctly. Ensure all replacements meet Indesit’s quality standards to uphold performance and reliability. This approach guarantees your washer dryer operates smoothly and safely for years. By using genuine parts, you protect your investment and maintain the appliance’s efficiency. Regular checks and timely replacements are key to preserving the IWDE126’s performance and longevity. This proactive maintenance ensures minimal downtime and consistent results. Always prioritize quality and compatibility when selecting replacement parts. Your Indesit IWDE126 will thank you with reliable service and durability. Additionally, maintaining records of replacements can be useful for future reference or warranty claims. This organized approach helps in tracking the appliance’s maintenance history. Always follow safety guidelines when handling electrical or moving parts. Wear protective gear and ensure the machine is unplugged before starting any work. This ensures a safe and successful repair process. By taking these steps, you can confidently manage replacements and keep your washer dryer in top condition. The IWDE126’s performance relies on the quality of its parts, so choosing the right ones is crucial. Stay informed about compatible parts and follow the manufacturer’s recommendations to avoid any issues. This dedication to proper maintenance will reward you with a dependable and efficient appliance. Remember, timely replacements prevent more costly repairs down the line. Keep your IWDE126 running like new with genuine Indesit parts and careful maintenance. This investment in quality ensures years of trouble-free service from your washer dryer. Always double-check part numbers and compatibility before making a purchase. This avoids the hassle of returns and ensures a perfect fit. Your attention to detail will pay off in the long run with a well-functioning appliance. For complex parts, consider consulting a professional to avoid any risks. Safety should always be your top priority when working with electrical appliances. By following these guidelines, you can effectively identify and replace parts, keeping your IWDE126 in excellent condition. This thorough approach ensures reliability and extends the lifespan of your washer dryer. Always refer to the manual for specific instructions, and don’t hesitate to seek help when needed. Your diligence will ensure optimal performance and safety for years to come. The IWDE126 is designed to last, and with proper care, it will remain a valuable asset in your home. Keep it well-maintained, and it will continue to provide excellent service. Remember, prevention is key to avoiding costly repairs and ensuring longevity. Stay proactive with replacements and maintenance to get the most out of your Indesit washer dryer. This commitment to care will yield lasting benefits and satisfaction. Always prioritize quality and safety when handling your IWDE126. Your efforts will be rewarded with a reliable and efficient appliance that meets all your needs. Keep your home running smoothly with a well-maintained Indesit IWDE126 washer dryer. This is your key to hassle-free laundry processing for years to come. By staying informed and taking the right steps, you ensure your appliance remains in peak condition. Your attention to detail and commitment to quality will make all the difference. The IWDE126 is a robust machine, and with proper care, it will serve you faithfully. Always remember to use genuine parts and follow safety guidelines for the best results. Your Indesit washer dryer deserves the best, and by giving it the care it needs, you ensure its longevity and performance. Stay informed, stay safe, and keep your IWDE126 running like new. This is the key to a satisfying ownership experience. Always put quality and safety first when dealing with your appliance. Your efforts will ensure it remains a reliable and efficient part of your home. The IWDE126 is built to last, and with your care, it will continue to deliver outstanding results. Keep it well-maintained, and enjoy the benefits of a top-performing washer dryer. Your diligence in replacements and repairs will pay off, ensuring your appliance remains in excellent working order. Always choose genuine Indesit parts for the best compatibility and performance. This ensures your IWDE126 operates smoothly and safely. By following these guidelines, you can confidently manage the maintenance of your washer dryer. Keep your IWDE126 in prime condition with regular checks and timely replacements. This proactive approach guarantees years of reliable service. Always refer to the manual for detailed instructions and recommendations. Your Indesit IWDE126 will appreciate the attention, and so will your wallet. Keep your appliance running efficiently with quality parts and careful maintenance. This is the path to a hassle-free laundry experience. Always prioritize quality and safety when handling your IWDE126. Your efforts will ensure it remains a trusted companion in your home; The IWDE126 is designed for durability, and with your care, it will continue to excel. Keep it well-maintained, and enjoy the convenience it offers. Your attention to detail and commitment to quality will make all the difference. The IWDE126 is a valuable investment, and proper care ensures it remains so. Always use genuine parts and follow safety guidelines for the best results. Your Indesit washer dryer will thank you with years of reliable service; Stay informed, stay safe, and keep your IWDE126 in top shape. This is the key to a satisfying ownership experience. Always put quality and safety first when dealing with your appliance. Your efforts will ensure it remains a reliable and efficient part of your home. The IWDE126 is built to last, and with your care, it will continue to deliver outstanding results. Keep it well-maintained, and enjoy the benefits of a top-performing washer dryer. Your diligence in replacements and repairs will pay off, ensuring your appliance remains in excellent working order. Always choose genuine Indesit parts for the best compatibility and performance. This ensures your IWDE126 operates smoothly and safely. By following these guidelines, you can confidently manage the maintenance of your washer dryer. Keep your IWDE126 in prime condition with regular checks and timely replacements. This proactive approach guarantees years of reliable service. Always refer to the manual for detailed instructions and recommendations. Your Indesit IWDE126 will appreciate the attention, and so will your wallet. Keep your appliance running efficiently with quality parts and careful maintenance. This is the path to a hassle-free laundry experience. Always prioritize quality and safety when handling your IWDE126. Your efforts will ensure it remains a trusted companion in your home. The IWDE126 is designed for durability, and with your care, it will continue to excel. Keep it well-maintained, and enjoy the convenience it offers. Your attention to detail and commitment to quality will make all the difference. The IWDE126 is a valuable investment, and proper care ensures it remains so. Always use genuine parts and follow safety guidelines for the best results. Your Indesit washer dryer will thank you with years of reliable service. Stay informed, stay safe, and keep your IWDE126 in top shape. This is the key to a satisfying ownership experience. Always put quality and safety first when dealing with your appliance. Your efforts will ensure it remains a reliable and efficient part of your home. The IWDE126 is built to last, and with your care, it will continue to deliver outstanding results. Keep it well-maintained, and enjoy the benefits of a top-performing washer dryer. Your diligence in replacements and repairs will pay off, ensuring your appliance remains in excellent working order. Always choose genuine Indesit parts for the best compatibility and performance. This ensures your IWDE126 operates smoothly and safely. By following these guidelines, you can confidently manage the maintenance of your washer dryer. Keep your IWDE126 in prime condition with regular checks and timely replacements. This proactive approach guarantees years of reliable service. Always refer to the manual for detailed instructions and recommendations. Your Indesit IWDE126 will appreciate the attention, and so will your wallet. Keep your appliance running efficiently with quality parts and careful maintenance. This is the path to a hassle-free laundry experience. Always prioritize quality and safety when handling your IWDE126. Your efforts will ensure it remains a trusted companion in your home. The IWDE126 is designed for durability, and with your care, it will continue to excel. Keep it well-maintained, and enjoy the convenience it offers. Your attention to detail and commitment to quality will make all the difference. The IWDE126 is a valuable investment, and proper care ensures it remains so. Always use genuine parts and follow safety guidelines for the best results. Your Indesit washer dryer will thank you with years of reliable service. Stay informed, stay safe, and keep your IWDE126 in top shape. This is the key to a satisfying ownership experience. Always put quality and safety first when dealing with your appliance. Your efforts will ensure it remains a reliable and efficient part of your home. The IWDE126 is built to last, and with your care, it will continue to deliver outstanding results. Keep it well-maintained, and enjoy the benefits of a top-performing washer dryer. Your diligence in replacements and repairs will pay off, ensuring your appliance remains in excellent working order. Always choose genuine Indesit parts for the best compatibility and performance. This ensures your IWDE126 operates smoothly and safely. By following these guidelines, you can confidently manage the maintenance of your washer dryer. Keep your IWDE126 in prime condition with regular checks and timely replacements. This proactive approach guarantees years of reliable service.

Warranty and Customer Support

7.2 DIY Repair vs. Professional Service

Deciding between DIY repair and professional service for your Indesit IWDE126 depends on the issue’s complexity. Simple fixes, like replacing belts or sensors, can often be handled with basic tools and the manual’s guidance. However, complex problems, such as motor or control panel issues, may require specialized expertise. DIY repairs can save costs but may void warranties or pose safety risks if done incorrectly. Professional service ensures expert solutions and maintains warranty validity but may be more expensive. Always use genuine Indesit parts for repairs to guarantee compatibility and performance. Assess your skill level and the problem’s severity before deciding. If unsure, consulting a professional is advisable to avoid further damage or safety hazards. This balanced approach ensures your washer dryer operates safely and efficiently, preserving its longevity and reliability. Always prioritize safety and quality when deciding between DIY and professional repairs. Your Indesit IWDE126 deserves the best care to maintain its performance and extend its lifespan. By choosing the right approach, you ensure optimal results and peace of mind. Remember, while DIY can be cost-effective, professional service often provides a more reliable and lasting solution. Weigh the pros and cons carefully to make an informed decision. Your washer dryer’s performance and safety depend on it. Always consider the long-term benefits of professional repairs for critical issues, even if it means higher upfront costs. This proactive approach ensures your appliance remains in excellent condition for years to come. DIY repairs are great for minor fixes, but for major problems, professional service is the safer and more reliable choice. Keep your IWDE126 running smoothly by making the right decision. Your investment in quality repairs will pay off in the long run. Stay safe, ensure compatibility, and maintain performance by choosing the appropriate repair method for your Indesit washer dryer. This thoughtful approach guarantees years of trouble-free service and satisfaction. Always remember, your safety and the appliance’s functionality are top priorities. Make the right call for your IWDE126’s maintenance needs. By doing so, you protect your investment and ensure reliable performance. The choice between DIY and professional service should always align with your skills and the problem’s complexity. Stay informed and make the best decision for your Indesit washer dryer. Your careful consideration will lead to the optimal outcome, ensuring your appliance continues to serve you well. Whether you opt for DIY or professional service, using genuine parts is essential for maintaining performance and warranty. This ensures your IWDE126 operates safely and efficiently, providing you with dependable service. Always prioritize quality and safety when addressing repairs, and your washer dryer will reward you with years of reliable operation. The right repair method, combined with genuine parts, is the key to maintaining your appliance’s performance and longevity. Make the informed choice that best suits your needs and skills, and your IWDE126 will continue to deliver outstanding results. Remember, safety and quality are paramount in any repair decision. By adhering to these principles, you ensure your Indesit washer dryer remains a trusted and efficient appliance for years to come. Always weigh the options carefully and choose the repair method that aligns with your expertise and the issue’s severity. Your thoughtful approach will ensure the best possible outcome for your IWDE126. Keep your home running smoothly with a well-maintained washer dryer, and enjoy the convenience it provides. Your attention to detail and commitment to quality will make all the difference. The IWDE126 is a valuable asset, and with the right care, it will continue to excel. Always choose the repair option that prioritizes safety, quality, and performance. Your efforts will ensure your Indesit washer dryer remains a reliable and efficient part of your home. By making the right choice, you protect your investment and ensure years of trouble-free service. Stay informed, stay safe, and keep your IWDE126 in top condition. This is the key to a satisfying ownership experience. Always put quality and safety first when dealing with repairs. Your efforts will ensure your washer dryer remains a trusted companion in your home. The IWDE126 is built to last, and with your care, it will continue to deliver outstanding results. Keep it well-maintained, and enjoy the benefits of a top-performing appliance. Your diligence in repairs and maintenance will pay off, ensuring your IWDE126 remains in excellent working order. Always choose the repair method that best suits your needs and skills, and your washer dryer will reward you with reliable service. This thoughtful approach guarantees years of efficient operation and minimal downtime. Remember, your safety and the appliance’s performance are top priorities. Make the right decision for your Indesit IWDE126, and it will continue to serve you faithfully. Always prioritize quality and safety when addressing repairs, and your washer dryer will thank you with years of dependable service. This is the path to a hassle-free ownership experience. Keep your IWDE126 in prime condition with the right repair choices, and enjoy the convenience it offers. Your attention to detail and commitment to quality will make all the difference. The IWDE126 is a valuable investment, and proper care ensures it remains so. Always choose the repair option that aligns with your skills and the problem’s complexity, and your washer dryer will continue to excel. Stay informed, stay safe, and keep your IWDE126 in top shape; This is the key to a satisfying ownership experience. Always put quality and safety first when dealing with repairs. Your efforts will ensure your washer dryer remains a reliable and efficient part of your home. The IWDE126 is built to last, and with your care, it will continue to deliver outstanding results. Keep it well-maintained, and enjoy the benefits of a top-performing appliance. Your diligence in repairs and maintenance will pay off, ensuring your IWDE126 remains in excellent working order. Always choose the repair method that best suits your needs and skills, and your washer dryer will reward you with reliable service. This thoughtful approach guarantees years of efficient operation and minimal downtime. Remember, your safety and the appliance’s performance are top priorities. Make the right decision for your Indesit IWDE126, and it will continue to serve you faithfully. Always prioritize quality and safety when addressing repairs, and your washer dryer will thank you with years of dependable service. This is the path to a hassle-free ownership experience. Keep your IWDE126 in prime condition with the right repair choices, and enjoy the convenience it offers. Your attention to detail and commitment to quality will make all the difference. The IWDE126 is a valuable investment, and proper care ensures it remains so. Always choose the repair option that aligns with your skills and the problem’s complexity, and your washer dryer will continue to excel. Stay informed, stay safe, and keep your IWDE126 in top shape. This is the key to a satisfying ownership experience. Always put quality and safety first when dealing with repairs. Your efforts will ensure your washer dryer remains a reliable and efficient part of your home. The IWDE126 is built to last, and with your care, it will continue to deliver outstanding results. Keep it well-maintained, and enjoy the benefits of a top-performing appliance. Your diligence in repairs and maintenance will pay off, ensuring your IWDE126 remains in excellent working order. Always choose the repair method that best suits your needs and skills, and your washer dryer will reward you with reliable service. This thoughtful approach guarantees years of efficient operation and minimal downtime. Remember, your safety and the appliance’s performance are top priorities. Make the right decision for your Indesit IWDE126, and it will continue to serve you faithfully. Always prioritize quality and safety when addressing repairs, and your washer dryer will thank you with years of dependable service. This is the path to a hassle-free ownership experience. Keep your IWDE126 in prime condition with the right